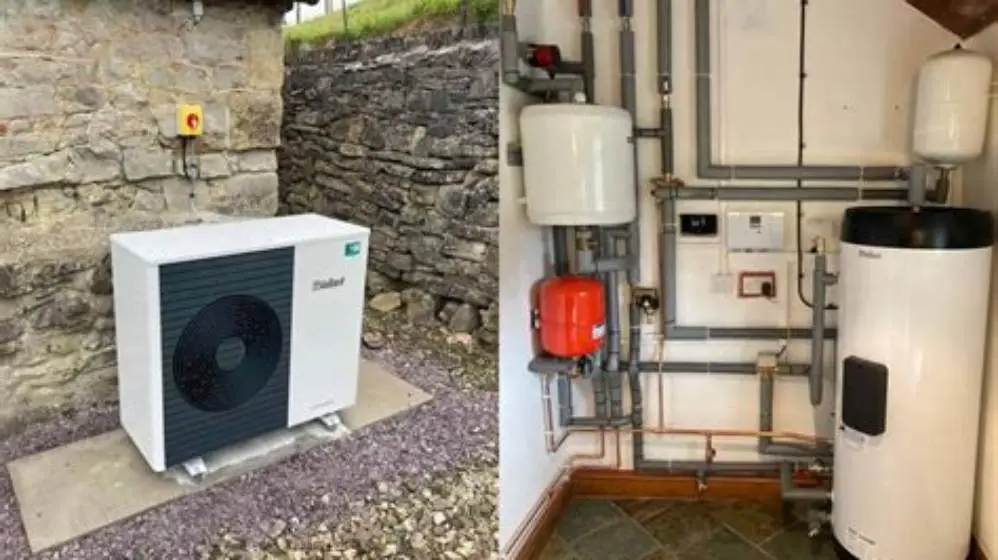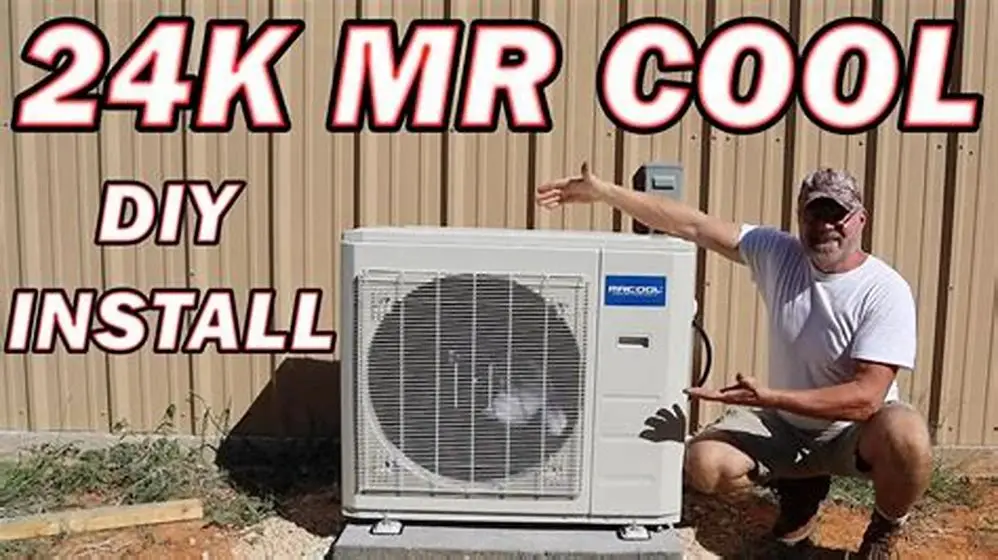
Installing a Mr Cool heat pump takes one to two days for a competent DIYer, but you'll lose £7,500 Boiler Upgrade Scheme funding unless an MCS-certified installer signs off the work. The wiring sequence runs outdoor unit to disconnect box to indoor head, with 230V supply and low-voltage control cables kept separate.
On this page
Part of our guide on boiler upgrade scheme eligibility
Quick facts
- Installation time
- 1-2 days, DIY
- BUS grant
- £7,500, MCS install only
- Power supply
- 230V single-phase
- Control cable
- Low-voltage, separate run
- Lineset max length
- Usually 7.5-15 m
- Part P notification
- Required for fixed wiring
Quick recap
- MCS certification requires a professional installer, so DIY rules you out of the £7,500 Boiler Upgrade Scheme grant
- Outdoor unit connects to a fused disconnect box within 3 metres, then to the indoor head via separate power and control cables
- Pre-charge copper linesets eliminate vacuum pumping, but kinking them voids the warranty and leaks refrigerant
- Electrical work must comply with Part P Building Regulations; notify your council or hire a qualified electrician
- Check your EPC rating before applying for funding: most schemes require band D or above
Grant eligibility and MCS certification requirements
The Boiler Upgrade Scheme pays £7,500 toward an air-source heat pump, but only when an MCS-certified installer completes the job. Mr Cool markets its units as DIY-friendly, and they are, but you forfeit that grant the moment you install it yourself. MCS certification covers design, installation and commissioning, not just a sign-off at the end. No installer will retrospectively certify a system they did not design or fit.
ECO4 funding also demands professional installation by an approved contractor, and the scheme targets lower-income households with properties below EPC band D. Check your EPC certificate before applying. If your home already has loft and cavity-wall insulation, you're less likely to qualify. The Warm Homes Plan, expected to launch fully in 2026, will impose similar MCS and fabric-first rules.
If grant funding matters to you, hire an MCS installer from the start. If you prefer to self-install and accept the cost, Mr Cool's pre-charged linesets and plug-and-play approach make the job faster than a traditional split system. The trade-off is clear: £7,500 against two days of labour and the satisfaction of doing it yourself.
One path forward is to install the system yourself, run it for a season to prove it works, then retrofit an MCS installation for a future property sale. That approach doubles the cost and wastes the first unit, so it rarely makes sense. Most buyers will want proof of professional installation and warranty cover tied to MCS registration. People in this spot often ask about home electric heat pump installation as well.
Tools and preparation before you start
You'll need a 13 mm and 17 mm spanner set to tighten the flare connections on the lineset, a spirit level, a masonry drill with 10 mm and 14 mm bits for the wall bracket, and a hole saw between 65 mm and 80 mm diameter to pass the refrigerant lines and cables through the wall. A multimeter confirms the 230V supply and checks continuity on the control wiring. A torque wrench is optional but prevents over-tightening the flare nuts, which cracks the copper and leaks refrigerant.
Mark the outdoor unit location before drilling. The concrete pad or wall bracket must sit on level ground, and the unit needs 300 mm clearance on the fan side for airflow, more if the wall reflects sound toward a neighbour's window. Measure twice. A unit mounted out of level runs noisily and drains poorly, and moving it later means new wall holes.
Check the indoor head position against furniture and curtains. The unit must mount at least 2 metres above the floor for air circulation, and the drain hose must slope downward without kinks. If the head sits above a sofa, cold air dumps straight onto anyone sitting there. If it's too close to the ceiling, the heat stratifies and never reaches the floor. There is more on qualifying for heat pump support in a separate guide.
Read the manual's wiring diagram before you cut any cable. Mr Cool supplies a low-voltage control cable and a separate power cable, and the terminal labels differ slightly between models. The diagram shows which wire colour lands on which terminal. Mixing them fries the control board, and that board costs £150 to £250 to replace.

VANPO HVAC Torque Wrench 10–80 Ft-lb
Covers the required adjustable torque range from 10 to 80 Ft-lb (13.56 to 108.5 Nm) with ±3% accuracy, suitable for flare nut refrigeration work.
Step-by-step Mr Cool heat pump installation procedure
The installation follows a fixed sequence, and jumping ahead causes rework. The outdoor unit mounts first, then the indoor head, then the lineset connects both, then the electrical wiring ties it together. Rushing the lineset connection risks kinking the copper, which leaks refrigerant and voids the warranty. Take it slowly.
Start with the outdoor unit. Bolt it to the mounting bracket or set it on a concrete pad. The pad must be level within 2 mm per metre and sit on compacted hardcore, not soil, or it will settle and tilt. Run the spirit level both ways. Once the refrigerant lines are connected, you cannot easily move the unit without recovering the gas. The other half of this decision is impact of mvhr airflow on heat pump.
Drill the hole through the wall at a 5-degree downward slope from inside to outside, so rainwater cannot run back into the room. Feed the lineset, control cable and drain hose through the hole together, leaving 500 mm of slack on both sides. Secure the indoor head to the mounting plate, making sure it clicks fully home. A head that's not seated properly vibrates and leaks condensate.
Connect the lineset flare nuts to the outdoor unit first, then to the indoor head. Tighten them with two spanners: one holds the port, the other turns the nut. Tighten until you feel resistance, then another quarter turn. Over-tightening splits the flare. Under-tightening leaks refrigerant. You'll hear a hiss if it's leaking. If you do, loosen the nut, check the flare for damage, and re-tighten.
Open the service valves on the outdoor unit with an Allen key, usually 4 mm or 5 mm. Turn each valve fully counter-clockwise. The refrigerant is now released into the system. You'll hear it flow. Wait five minutes for pressure to equalise, then check every connection with soapy water. Bubbles mean a leak. Fix it now, before you power up the system. Before you commit to anything, it is worth looking at before december 2026 eco4 criteria.
Wire the control cable to the terminals on both units, matching the colours to the diagram. The power cable runs from the outdoor unit to a fused disconnect box, then to your consumer unit. The disconnect box must sit within 3 metres of the outdoor unit, and the fuse should be 16 A or 20 A depending on the unit's rated current. Use 2.5 mm² twin-and-earth cable for the power run if the circuit is less than 20 metres. Longer runs need 4 mm².
Power up the system and run it in cooling mode for ten minutes. If the indoor head blows cold air and the outdoor fan spins, the refrigerant circuit is sealed and the wiring is correct. Switch to heating mode and let it run for another ten minutes. The indoor head should blow warm air, and the outdoor coil should feel cold. If the head stays cold in heating mode, you've reversed the control wires.
- Mount the outdoor unit on a level bracket or concrete pad, checking level in both directions.
- Drill a 65-80 mm hole through the wall at a 5-degree downward slope from inside to outside.
- Install the indoor head mounting plate 2 metres above the floor, avoiding obstructions.
- Feed the pre-charged lineset, control cable and drain hose through the wall with 500 mm slack.
- Connect the flare nuts to outdoor unit ports, tightening with two spanners to avoid over-torque.
- Attach the lineset to the indoor head, again using two spanners and a quarter-turn past resistance.
- Open the service valves on the outdoor unit fully counter-clockwise with a 4-5 mm Allen key.
- Wait five minutes, then check every joint for leaks using soapy water and watching for bubbles.
- Wire the control cable to both units, matching colours to the diagram in the manual.
- Run power cable from outdoor unit to fused disconnect box, then to consumer unit with 16-20 A breaker.
- Power up and test in cooling mode for ten minutes, then switch to heating and verify warm airflow.
Wiring diagram explanation for DIY installers
The Mr Cool wiring diagram splits into two circuits: a low-voltage control loop between the indoor and outdoor units, and a 230V power feed to the compressor and fan. The control cable typically has four to six cores, colour-coded red, white, black, brown, yellow and blue depending on the model. Each wire lands on a screw terminal marked L, N, S, or numbered 1 through 4. The manual's diagram is the only reliable source for your specific model.
The power circuit runs from your consumer unit to a fused spur or disconnect box, then to the outdoor unit's terminal block. The disconnect box must be accessible and marked, because the compressor draws 10 to 15 amps on startup and an engineer needs to isolate it safely. Mount the box on the wall within arm's reach of the outdoor unit. The cable entry should point downward to keep rain out.
Part P Building Regulations require that you either notify your local authority before starting fixed electrical work or hire a registered electrician to do it. Notification costs £100 to £200 depending on the council, and they'll want to inspect the installation or see test certificates. If you sell the house within a few years, the buyer's solicitor will ask for the Building Regulations compliance certificate. Without it, you'll pay for a retrospective inspection or a price reduction.
Run the power and control cables in separate conduit or clipped to the wall with at least 50 mm separation. Bundling them together induces electrical noise in the control loop, which causes erratic thermostat behaviour or compressor stuttering. Use outdoor-rated cable glands where the cables enter the units, and seal the gland with silicone to keep moisture out of the terminal box.
The control thermostat (often a wireless unit with Mr Cool systems) communicates with the indoor head over infrared or a dedicated wire. If your model uses a wired thermostat, the cable runs from the head to the wall-mounted stat, usually a two-core low-voltage cable. Route it through the cavity or surface-mount it in mini-trunking. Do not run it parallel to mains cables for more than a metre.
| Wire colour | Terminal label | Function |
|---|---|---|
| Red | 1 or L1 | Compressor call signal |
| White | 2 or N | Neutral return |
| Black | 3 or C | Common reference |
| Yellow | 4 or Y | Reversing valve (heating mode) |

AstroAI Digital Multimeter Tester 2000 Counts with DC AC Voltmeter and Ohm
Does not specify 600V AC range or continuity beeper, only general AC/DC voltage and continuity support mentioned.
Common mistakes that void the warranty
Kinking the pre-charged lineset is the most common error, and it's unrecoverable without a refrigerant recovery machine and a replacement lineset. The copper work-hardens at the kink and cracks under pressure cycling. Mr Cool's warranty excludes any damage caused during installation, and a kinked line counts as installation damage. If you need to bend the lineset around a tight corner, use a 15 mm or 22 mm pipe bender depending on the line diameter, or take a longer route.
Over-tightening the flare nuts splits the brass compression ring and leaks refrigerant slowly. You won't notice it during commissioning, but within a month the system loses cooling capacity and the compressor runs continuously. Retightening a leaking flare rarely works, because the flare surface is already scored. You'll need to cut the pipe back, anneal it, and re-flare it, which means recovering the refrigerant first. That job costs £300 to £500 if you hire someone, or you can buy a recovery machine for £400 to £600 and do it yourself next time.
Running the system without opening the service valves is surprisingly common. The compressor tries to pump against a closed valve, overheats, and trips on the internal thermostat. Repeated over-temperature trips shorten the compressor's life. Some installers assume the valves ship open, but they don't. Check the manual, and turn each valve counter-clockwise until it stops.
Mounting the outdoor unit on uncompacted soil or paving slabs on sand guarantees settlement. The unit weighs 40 to 60 kg dry, and vibration from the compressor works it deeper into the ground. Within six months it tilts, the fan blade scrapes the casing, and the condensate tray overflows. Dig out 150 mm of soil, fill with MOT Type 1 hardcore, compact it with a whacker plate, then lay a 50 mm concrete slab or set precast paving slabs on a mortar bed.
- Kinking the lineset: use a pipe bender or reroute rather than forcing a tight bend by hand
- Over-tightening flare nuts: stop at a quarter-turn past resistance, never reef on it
- Forgetting to open service valves: turn each one fully counter-clockwise before powering up
- Mounting on soft ground: dig out 150 mm, compact hardcore, pour a 50 mm concrete pad
Testing and commissioning after installation
Run the system in cooling mode for fifteen minutes and measure the supply and return air temperatures at the indoor head. The temperature drop should be 8 to 12 °C if the refrigerant charge is correct and the airflow is unobstructed. A drop below 8 °C suggests low airflow, usually a dirty filter or a blocked coil. A drop above 12 °C with low airflow can mean the fan speed is set wrong. Check the dip switches or remote settings.
Switch to heating mode and wait five minutes for the reversing valve to settle. Measure the supply air temperature; it should read 35 to 45 °C when the outdoor temperature is above 5 °C. If the air is cooler than that, the system is undersized for the heat loss, or the outdoor coil is already icing up because the defrost cycle isn't triggering. Ice on the outdoor coil is normal during defrost, but continuous ice means a fault.
Check the condensate drain by pouring a jug of water into the indoor head's drip tray. Water should flow freely out of the drain hose and exit outside the building. If it backs up, the hose is kinked or the trap is blocked. A blocked drain overflows inside the house and ruins the ceiling below. Clear it now, while you still have the cover off.
Record the voltage at the outdoor unit's terminal block while the compressor is running. It should stay above 220V under load. If it drops below 215V, the cable is undersized for the run length, or your supply voltage is weak. Low voltage makes the compressor draw more current and overheat. You'll need a thicker cable or a dedicated circuit from the consumer unit.
Listen for unusual noise. A low hum from the compressor is normal. A loud buzz suggests a loose mounting bolt or a failing compressor mount. A squeal from the fan means a worn bearing. A gurgling sound inside the pipes is refrigerant equalising, and it stops after a few minutes. A hiss at a flare connection is a leak. Fix it before the charge drops.
Quick questions
Can I claim the Boiler Upgrade Scheme grant after installing a Mr Cool heat pump myself?
No. The BUS grant requires an MCS-certified installer to design, install and commission the system. MCS will not retrospectively certify a DIY installation. You forfeit the £7,500 grant the moment you install it yourself, and no installer will sign off work they did not oversee.
Do I need to notify Building Control for the electrical work on a heat pump?
Yes, if you're doing the wiring yourself. Part P requires notification for new fixed wiring connected to the consumer unit. You can notify your local authority before starting, or hire a registered electrician whose work is self-certified. Notification costs £100 to £200, and you'll need the compliance certificate for future house sales.
How do I know if the refrigerant charge is correct after opening the service valves?
Run the system in cooling mode and measure the supply and return air temperatures. A drop of 8 to 12 °C indicates the correct charge. Below 8 °C suggests low airflow, above 12 °C can mean overcharge or restricted airflow. Check for leaks with soapy water at every flare connection.
What size cable do I need for the power supply to the outdoor unit?
Use 2.5 mm² twin-and-earth for runs under 20 metres, assuming a 16 A or 20 A breaker. Longer runs need 4 mm² to prevent voltage drop. Check the manual for your unit's rated current, and size the cable so voltage stays above 220 V under load.
Can I install a Mr Cool heat pump in Scotland or Northern Ireland?
Yes, but grant schemes differ. Scotland offers the Home Energy Scotland grant and loan, which may cover part of the cost if installed by an MCS contractor. Northern Ireland has its own schemes under NI Energy Advice. Check eligibility locally before committing to a DIY install, because you'll lose funding either way.