Step-by-step guidance for electric heat pump installation, covering home needs, sizing, pitfalls, and testing for efficient heating.
Efficient electric heat pump installation depends on proper home insulation, accurate sizing usually based on heating demand in kilowatts, and following three critical installation checks: refrigerant charge, airflow balance, and electrical setup. Testing with a manometer and airflow meter confirms performance.
On this page
- The short version
- Prerequisites a home needs for installation
- How to size the heat pump for a home
- Critical installation steps and common pitfalls
- How to test the system after installation
- Electric heat pump installation: key checks to ensure efficient home heating
- Finding trustworthy suppliers and local funding for your project
- Questions people still ask
Part of our guide on confirming eligibility checklist
Precise steps and checks during electric heat pump installation secure efficient, reliable home heating and avoid costly errors.
| Typical home size | 100-200 m² |
|---|---|
| Heat pump size range | 2-6 kW heating |
| Recommended pressure check | 30-40 psi |
| Airflow volume | 150-250 CFM per outlet |
| Installation time | 1-3 days |
The short version
- Ensure home insulation and ventilation meet heat pump requirements before installation.
- Size the heat pump to match the home's specific heating load, usually 2-6 kW for typical homes.
- Verify refrigerant charge, airflow, and electrical connections during installation.
- Test system pressure and airflow post-installation to confirm efficiency.
- Use a refrigerant gauge set and anemometer to perform essential checks.
Prerequisites a home needs for installation
A home must have adequate insulation and airtightness for an electric heat pump to operate efficiently. Typical insulation levels correspond to a heat loss rate below about 50 W/m² in cold weather.
Existing heating systems like radiators may need upgrading to larger surface-area versions or replacement with underfloor heating to deliver the lower-temperature heat pumps produce effectively.
Good ventilation must be maintained because heat pumps reduce indoor air temperature fluctuations, which can lead to moisture buildup if ventilation is insufficient.
In colder climates, homes with large single-pane windows or significant thermal bridging may require additional measures such as secondary glazing or thermal breaks before heat pump installation to maintain efficiency. For example, a house with heat loss exceeding 60 W/m² might see a 10-15% drop in heat pump performance unless these issues are addressed. The other half of this decision is using both grant and loan options.
Homes using existing ductwork for air distribution should have ducts inspected for leaks and insulation quality. Leaky or poorly insulated ducts can reduce system efficiency by up to 25%, and sealing these leaks with mastic or foil tape is recommended before installation to preserve output.
| Parameter | Minimum Standard | Effect on Heat Pump Efficiency |
|---|---|---|
| Wall insulation | U-value ≤ 0.3 W/m²K | Reduces heat demand, optimizes COP |
| Window quality | Double or triple glazed | Maintains indoor temperature stability |
| Ventilation rate | 0.5 air changes/hour | Prevents condensation and mold growth |
How to size the heat pump for a home
Sizing depends chiefly on your home's heat loss, which varies with size, insulation, and climate. Typical small to medium homes require heat pumps rated between 2 kW and 6 kW heating capacity.
Oversizing leads to short cycling that reduces efficiency and equipment life; undersizing causes insufficient heating and excessive supplemental heating bills. Before you commit to anything, it is worth looking at upfront energy-efficient heating grants.
A heat loss calculation by a qualified assessor or using standard calculation tools based on floor area, insulation, and local temperatures is essential for accurate sizing.
Heat pump sizing must also consider the design temperature for the coldest month. For instance, a home in a region with design temperatures of -10°C requires about 20% more heating capacity than one with a design temperature of 0°C, even if insulation is similar.
A worked example: For a 120 m² house with an insulation heat loss rate of 40 W/m², the total heat loss is 120 × 40 = 4800 W or 4.8 kW. Selecting a heat pump with a 5 kW heating capacity would suit this home, allowing a small margin for colder conditions. For the detail, see our notes on buy and install solar panels for home.
Sizing should also factor in domestic hot water heating if the heat pump will provide it. This may increase capacity needs by 0.5 to 1 kW depending on household size and hot water demand.
- Measure your home's floor area and insulation quality.
- Identify your local design temperature (the coldest expected outdoor temperature).
- Calculate heat loss with formula or assessment (e.g., heat loss = floor area × heat loss per m²).
- Choose a heat pump sized to at least match calculated heat loss, preferably with a small margin.
Critical installation steps and common pitfalls
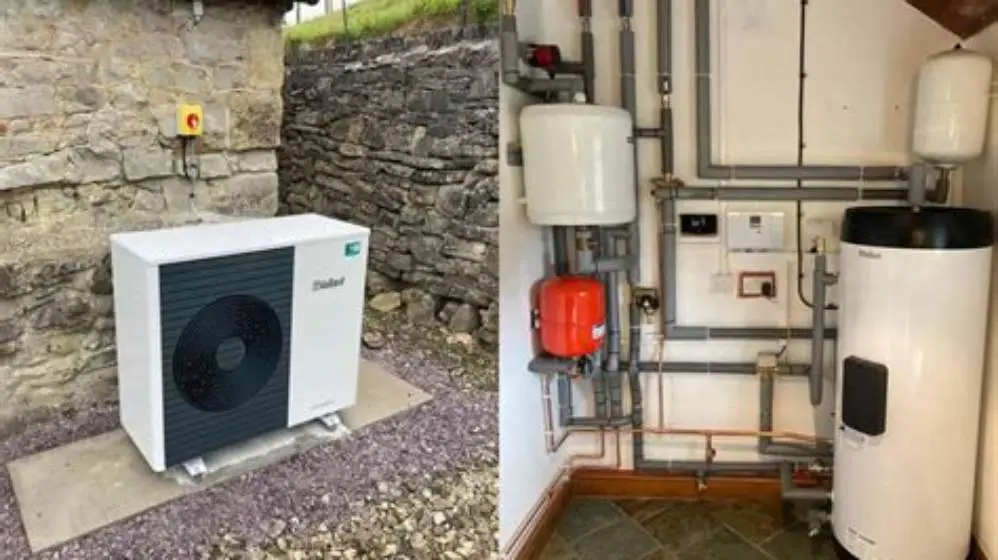
Installation requires mounting the outdoor and indoor units with proper clearance for airflow and maintenance. Incorrect placement can reduce efficiency by up to 20%.
Refrigerant lines must be carefully charged to the manufacturer's specified pressures, usually around 30-40 psi, to ensure optimal heat transfer. Before you commit to anything, it is worth looking at warm homes local grant eligibility england.
Electrical connections need correct wiring and circuit protection. Improper electrical setup risks damage and voids warranties.
Common pitfalls include installing units too close to obstacles, failing to insulate refrigerant pipes, and neglecting proper drainage for condensate water.
A common pitfall is neglecting the correct refrigerant pipe length and insulation thickness. Exceeding manufacturer recommended pipe lengths, usually about 15-20 meters, may lead to pressure drops and reduced cooling/heating capacity. Insulating pipes with at least 13 mm thick closed-cell foam prevents heat loss and condensation.
Drainage around the outdoor unit should be planned to avoid water pooling which can freeze and damage the unit during winter. Installing a small raised platform or gravel bed with drainage pipes can mitigate this risk.
Electrical work must include verifying the grounding system. Poor grounding can cause electrical noise, sensor errors, and safety hazards. A ground resistance below 10 ohms is recommended for effective protection.
- Outdoor unit: position on a stable base with 0.5-1 m clearance.
- Refrigerant charge: verify with gauge set, adjust per manual.
- Electrical work: use dedicated circuit breaker, correct wiring size.
- Condensate drainage: ensure downhill slope and frost protection.
How to test the system after installation
Once installed, testing confirms the system operates within design parameters. Key tests include refrigerant pressure checks, airflow measurements, and electrical safety inspections.
A manifold gauge set measures refrigerant pressure: low and high side pressures should align with manufacturer specs at the current outdoor temperature.
Airflow is tested using an anemometer; typical air volume per outlet should be 150-250 cubic feet per minute, depending on system size.
Electrical circuits need insulation resistance and continuity testing to prevent faults and ensure safety.
To verify refrigerant charge, the technician measures pressures at steady outdoor temperature conditions, ideally above 5°C to avoid erroneous readings. For example, at 7°C outdoor temperature, a low side pressure of 35 psi is expected for many models but must be confirmed with the specific manufacturer chart.
Airflow testing should include checking each vent individually. Variations greater than 30 CFM between vents suggest duct issues or blockages. Balancing dampers may be adjusted to equalize flow and avoid cold spots.
Electrical testing also involves verifying voltage stability under load. A drop greater than 5% from nominal voltage (e.g., from 230 V to below 218 V) can reduce compressor efficiency and lifespan. Measuring voltage both at the breaker and at the unit confirms wiring integrity.
- Connect manifold gauges to refrigerant lines and record pressures.
- Use an anemometer at indoor unit vents to check airflow volume.
- Inspect condensate drainage during operation for leaks or blockages.
- Perform electrical tests with a multimeter or insulation tester.
Electric heat pump installation: key checks to ensure efficient home heating
Three key checks during installation safeguard efficiency: refrigerant charge, airflow balance, and electrical safety.
Refrigerant charge must be within ±10% of manufacturer pressure specs, usually 30-40 psi low side depending on outdoor temperature.
Airflow must be uniform across all indoor vents, avoiding volumes below 150 CFM or above 250 CFM which reduce performance or cause noise.
Electrical wiring and circuit breakers must comply with local standards, with no voltage drop over 5% at peak load.
Noise levels are another key check often overlooked. The outdoor unit should produce less than 60 dB(A) at 1 meter to avoid disturbance, especially in densely populated areas. Excessive noise can indicate mechanical faults or incorrect mounting.
Condensate drainage must be inspected for correct slope and absence of blockages. Stagnant water leads to mold growth and can cause indoor air quality issues. A slope of at least 1% away from the unit is advised.
System controls and thermostats must be calibrated and tested to ensure proper temperature regulation. Incorrect sensor placement or wiring faults can cause temperature swings that reduce comfort and increase energy use.
| Check | Acceptable Range | Effect of Failure |
|---|---|---|
| Refrigerant Pressure | ±10% of spec (30-40 psi) | Reduced COP, system damage risk |
| Airflow Volume | 150-250 CFM per vent | Uneven heating, noise increase |
| Voltage Drop | <5% at peak | Electrical faults, system trips |
Finding trustworthy suppliers and local funding for your project
Select suppliers with proven installation experience, verified reviews, and proper certifications such as MCS or equivalent. Installation mishaps often stem from poor workmanship.
Local grants or government schemes may subsidize up to 30-50% of installation costs for heat pumps, but eligibility depends on property type, income, and regional rules.
Ask suppliers for references of completed projects nearby and their compliance with local building regulations to avoid surprises during inspection.
Consult your local energy advice centre for up-to-date funding opportunities and ensure installers provide detailed quotes including all parts and labor.
- Supplier credentials: MCS certification or equivalent.
- References: recent local installations with customer feedback.
- Funding: check government and local council grants.
- Quotes: demand detailed breakdowns and warranty terms.
Questions people still ask
Can I install an electric heat pump in any home?
Not every home is suitable. It needs sufficient insulation, space for indoor and outdoor units, and an electric supply capable of handling the load. Older homes may require upgrades.
How do I know if my heat pump is correctly sized?
A detailed heat loss calculation is needed. Oversized units cycle too frequently; undersized ones fail to heat adequately. Professional assessment or reliable calculators help determine the right size.
What happens if the refrigerant charge is incorrect?
Incorrect charge lowers efficiency, increases wear, and can damage the compressor. Always check with a gauge set and adjust to manufacturer specs.
Are there any risks during installation I should be aware of?
Poor electrical connections pose fire risks, improper refrigerant handling can leak gases, and bad positioning reduces efficiency. Use certified installers and insist on testing.
How do I find and apply for local funding for heat pump installation?
Check your local government or energy agency websites for current schemes. Eligibility often depends on income, property age, and location. Always request documentation from suppliers.