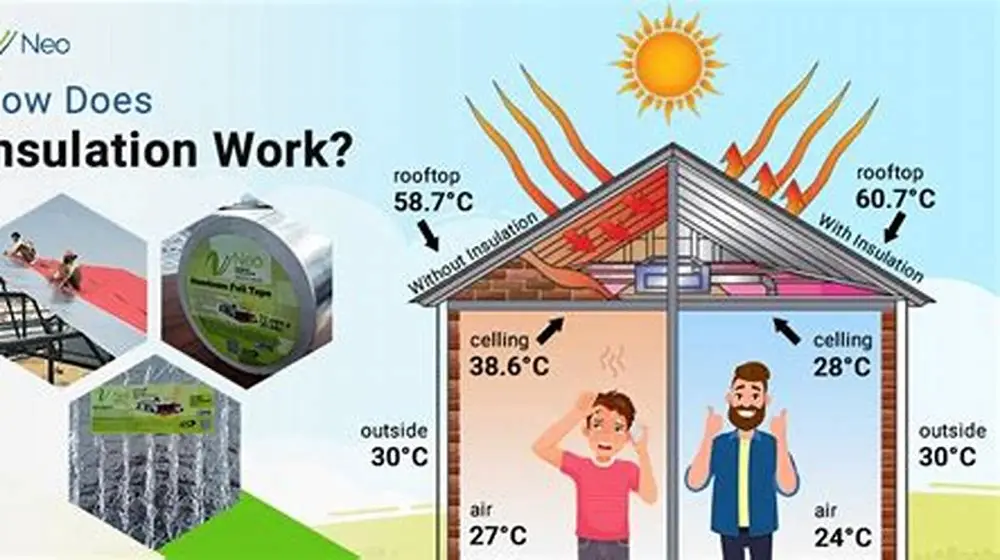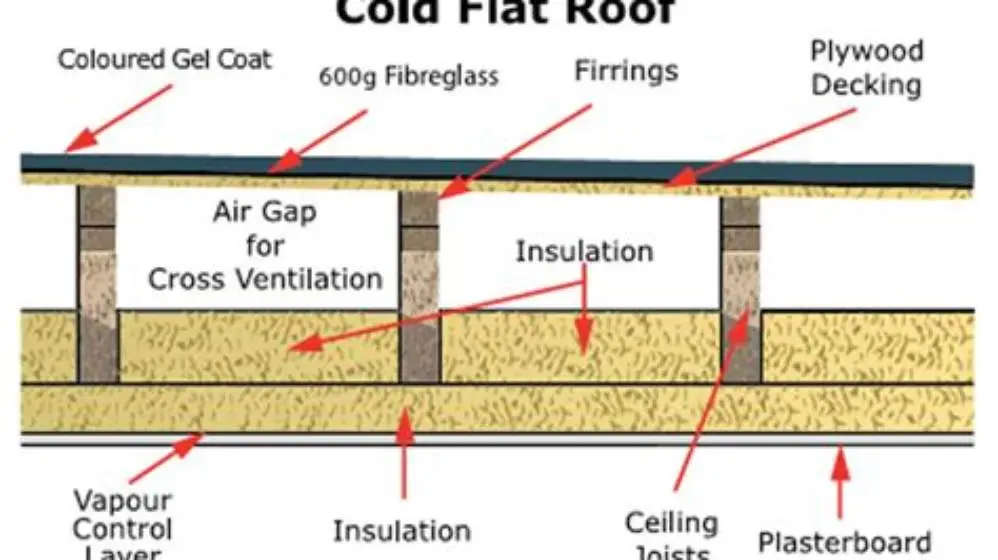
A cold flat roof feels cold because insulation sits between the ceiling joists below the deck rather than above it, leaving the roof structure itself unheated. Small lofts suit 100-150 mm rigid PIR or mineral wool batts between joists, but you'll need ventilation gaps and a vapour barrier to stop condensation rotting the deck.
On this page
- Quick recap
- How to identify why a flat roof feels cold
- Why cold deck insulation leaves the roof structure cold
- Cold deck flat roof insulation options for small lofts
- Ventilation gaps and vapour barriers you can't skip
- Advantages of different insulation types for cold flat roofs
- Check joist depth and measure three times before you order
- Quick questions
Part of our guide on heat flow blocking by insulation
Quick facts
- Cold deck temp drop
- 5-8°C below room temperature
- Min ventilation gap
- 50 mm above insulation
- PIR thickness needed
- 100-120 mm for 0.18 W/m²K
- Mineral wool thickness
- 150-170 mm for same U-value
- Joist depth typical
- 100-150 mm in UK flat roofs
- Spray foam cost
- £40-60 per m² installed
Quick recap
- Check surface temperature: a cold deck roof reads 5-8°C colder than room temperature from below
- Rigid PIR boards at 100 mm give the same performance as 150 mm mineral wool in half the depth
- Cold deck insulation needs a 50 mm ventilation gap above it and cross-flow vents at opposite edges
- Spray foam fills irregular joist spaces but costs £40-60 per square metre installed
- Measure joist depth before buying: most UK flat roofs have 100-150 mm joists, limiting insulation thickness
How to identify why a flat roof feels cold
A flat roof feels cold from below when heat escapes through insufficient insulation or when the insulation sits in the wrong place. The structure itself stays cold because it sits outside the insulated envelope. Check the ceiling surface temperature with an infrared thermometer: a properly insulated cold deck reads 2-3°C below room temperature, while an under-insulated one drops 5-8°C or more. That gap tells you whether the insulation is missing, too thin, or badly fitted.
Thermal bridging through the joists accounts for another chunk of heat loss. Wooden joists conduct heat around the insulation batts, creating cold stripes you can feel with your hand. Steel joists are worse: they'll show up as dark lines on a thermal image and can drop the effective U-value by 20-30% compared to the insulation alone. Measure the joist spacing and width: joists at 400 mm centres with 50 mm timber create less bridging than 600 mm centres with 75 mm steel.
Condensation stains, black mould along the edges, or a damp smell point to missing or failed vapour control. Cold deck roofs trap moisture between the warm room below and the cold deck above unless you fit a vapour barrier on the warm side of the insulation. Check the loft void itself: if you can see wet patches on the underside of the deck or drips forming in winter, ventilation is blocked or the vapour barrier is torn. Both need fixing before you add more insulation, or you'll seal the problem in.
Drafts around the perimeter suggest gaps between the insulation and the joists or at the junction with the walls. Push the insulation gently: if it compresses or pulls away from the edges, it's either the wrong thickness or poorly cut. Rigid boards should friction-fit between joists with no visible light gaps. Mineral wool batts should fill the space without being squashed, because compressing them reduces their R-value by up to 50%. Measure the actual joist depth with a tape measure before you buy anything, and subtract 50 mm for the ventilation gap you'll need above the insulation. Before you commit to anything, it is worth looking at removing small foam patches.
Why cold deck insulation leaves the roof structure cold
Cold deck construction puts the insulation between the ceiling joists, below the roof deck. The deck, the joists, and the void above the insulation all sit on the cold side of the thermal envelope. They stay at outdoor temperature in winter, which is why the ceiling feels cold and why condensation risk is high. This approach was standard in UK flat roofs built before the 1990s because it was cheap and kept ceiling height intact, but it demands careful detailing to work without rotting the structure.
The alternative, warm deck insulation, sits on top of the roof deck and keeps the entire structure warm. It's the better choice for new builds and full re-roofs, giving lower U-values and no condensation risk. But it's not a retrofit option for a small loft with limited headroom because it adds 150-200 mm to the roof height and requires new upstands, flashings, and a new weatherproof membrane. Cold deck insulation is the only option that doesn't touch the outside or raise the roof line.
Small lofts exaggerate the problem. Joist depth limits how much insulation you can fit, and the 50 mm ventilation gap above the insulation eats into that depth. A typical 100 mm joist leaves you 50 mm for insulation, which won't meet current Building Regulations unless you use the highest-performing material available. Joists at 150 mm give you 100 mm of insulation space, just enough for rigid PIR to hit a U-value of 0.18 W/m²K. Anything less, and you're choosing between better insulation and adequate ventilation. People in this spot often ask about best roof insulation types as well.

Wintact Infrared Thermometer
Measures surface temperature from -58℉ to 1112℉, covering the range needed to identify cold roof spots accurately.
Cold deck flat roof insulation options for small lofts
Rigid PIR (polyisocyanurate) boards deliver the best thermal performance per millimetre, making them the default choice for shallow joists. A 100 mm PIR board at λ 0.022 W/mK gives an R-value of 4.5 m²K/W, enough to meet Building Regulations in a 150 mm joist with the ventilation gap. The boards are stiff, so they friction-fit between joists without sagging, and they include a foil facing that acts as a vapour barrier when the joints are taped. They cost £15-25 per square metre for the board alone, depending on brand and thickness.
Mineral wool batts, either glass or rock wool, are cheaper at £8-12 per square metre but need 150-170 mm thickness to match PIR's performance. That rules them out for 100 mm joists and makes them tight in 150 mm joists once you account for the ventilation gap. They're semi-rigid, so they compress slightly when pushed into place, which is fine as long as you don't squash them below their rated thickness. Mineral wool is non-combustible, which matters if the loft is used for storage or has electrical cables running through it, and it's more forgiving of moisture because it dries out without losing performance.
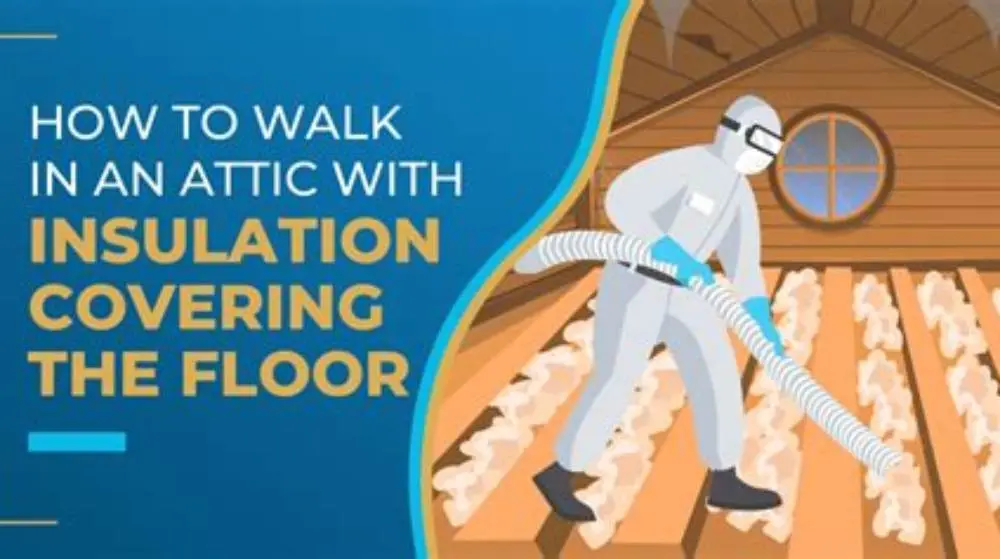
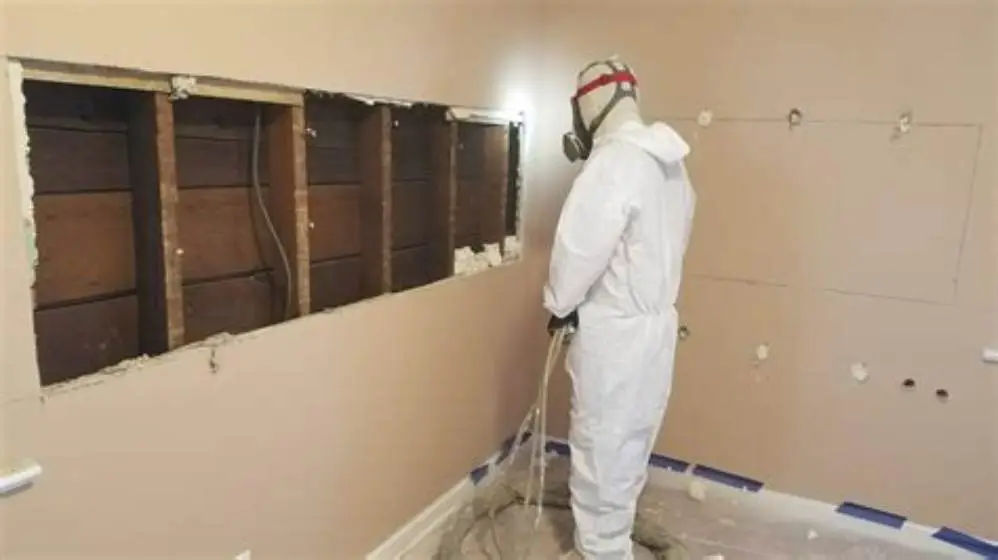
Spray foam insulation, either open-cell or closed-cell, fills irregular joist spaces and seals around pipes and cables without cutting or fitting. Open-cell foam needs 200-250 mm to hit the same U-value as 100 mm PIR, so it's only viable in deep joists or where you accept a worse U-value. Closed-cell foam at 100-120 mm performs closer to PIR and adds racking strength to the roof, but it costs £40-60 per square metre installed and you can't remove it later. Spray foam also eliminates the ventilation gap, which is fine if the foam itself forms an airtight seal, but catastrophic if it doesn't, because trapped moisture has nowhere to go. Before you commit to anything, it is worth looking at attic insulation you can walk on.
Phenolic foam boards are thinner still, at λ 0.020 W/mK, but they cost 30-50% more than PIR and are harder to source in small quantities. They're worth considering if you're down to 50-70 mm of usable depth and nothing else will fit, but most small lofts will get better value from PIR at 100 mm or accepting a slightly worse U-value with mineral wool at 120 mm plus a supplementary layer under the joists.
| Material | Thickness for 0.18 W/m²K | Cost per m² | Fits 100 mm joists | Moisture tolerance |
|---|---|---|---|---|
| Rigid PIR board | 100-120 mm | £15-25 | No (needs 150 mm) | Low: needs vapour barrier |
| Mineral wool batt | 150-170 mm | £8-12 | No | High: dries without damage |
| Closed-cell spray foam | 100-120 mm | £40-60 installed | Possible | High: forms own barrier |
| Open-cell spray foam | 200-250 mm | £25-40 installed | No | Moderate: needs vapour barrier |
| Phenolic foam board | 90-100 mm | £25-35 | Tight | Low: needs vapour barrier |
Ventilation gaps and vapour barriers you can't skip
A cold deck roof needs a continuous 50 mm ventilation gap above the insulation to let moisture escape. Without it, condensation forms on the underside of the cold deck and drips back onto the insulation or the ceiling below. The gap must run the full length of the roof with vents at opposite edges to create cross-flow. Soffit vents at one side and ridge or high-level vents at the other give the best airflow. Measure the actual gap with a ruler after fitting the insulation: anything less than 40 mm starts to choke off airflow, and you'll see damp patches within a year.
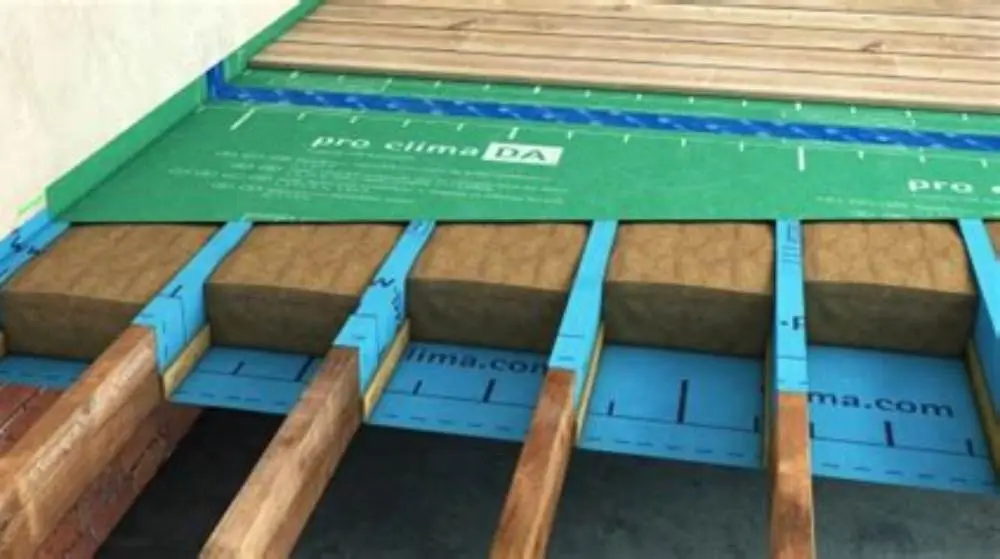
Fit a vapour control layer on the warm side of the insulation, which means directly above the ceiling or below the insulation if you're working from above. The barrier stops warm, moist air from the room below reaching the cold deck where it would condense. Foil-faced PIR boards act as their own vapour barrier if you tape the joints with foil tape; mineral wool needs a separate polyethylene sheet at least 0.15 mm thick or a dedicated vapour control membrane. Overlap joints by 150 mm and tape them, and turn the edges up the walls by 100 mm. Before you commit to anything, it is worth looking at materials for floor insulation.
Ventilation and vapour control work together. The barrier reduces the amount of moisture reaching the void, and the ventilation removes whatever gets through. Skip either one and the other can't cope. A common mistake is fitting the vapour barrier on the cold side of the insulation, where it traps moisture instead of stopping it. Another is blocking the ventilation gap with insulation that's too thick or sags into the gap. Check both before you close up the ceiling.
Small lofts with restricted joist depth force a choice: thicker insulation and a smaller vent gap, or a full 50 mm gap and thinner insulation. A 40 mm gap with 110 mm of PIR is better than a 50 mm gap with 100 mm of mineral wool that doesn't meet the U-value, but worse than 100 mm of PIR with a 50 mm gap. If the joists are only 100 mm deep, you either accept that you can't meet Building Regulations with insulation alone, or you add a layer of insulated plasterboard to the ceiling below to make up the difference.
Advantages of different insulation types for cold flat roofs
Rigid PIR boards win on depth: they deliver the lowest U-value in the least space, which is the whole point in a small loft. They're easy to cut with a handsaw or a sharp knife, they don't itch or shed fibres, and the foil facing reflects radiant heat back into the room. The boards are stable, so they won't sag or compress over time, and they're unaffected by minor leaks as long as you dry them out. They're the best choice when joist depth is tight and you need to hit 0.18 W/m²K. The other half of this decision is insulation retrofit options for 4 storey.
Mineral wool batts cost less, breathe better, and won't melt or release toxic fumes in a fire. They're the safer choice in lofts with storage, boilers, or anything that could ignite. The batts compress slightly during fitting, which helps them fill irregular joist spaces, and they recover their thickness once released. They tolerate moisture better than rigid boards: a damp mineral wool batt dries out and returns to full performance, while a wet PIR board can delaminate. Choose mineral wool when fire performance matters or when you're retrofitting over old insulation and can't be sure the vapour barrier is intact.
Spray foam seals every gap, eliminates thermal bridging through the joists, and adds racking strength to tired roof structures. Closed-cell foam stops vapour dead, so it removes the need for a separate barrier, and it bonds to the deck and joists, which can stiffen a sagging roof. It's the best choice for irregular joist layouts, curved decks, or lofts with services running everywhere. The cost and irreversibility are the trade-offs: you can't remove spray foam without stripping the deck, and any future roof work means cutting through it.
Phenolic foam boards are the niche option for extreme space constraints. They're 10% thinner than PIR for the same U-value, which sounds small but matters when you're trying to fit 100 mm of insulation into a 120 mm joist. They're also more brittle and harder to cut cleanly, and availability is patchy outside trade suppliers. Use them when PIR won't physically fit and spray foam isn't appropriate.
- PIR: thinnest for target U-value
- Mineral wool: non-combustible and moisture-tolerant
- Spray foam: seals gaps and strengthens structure
- Phenolic: slimmest option for very tight spaces
- PIR: needs careful vapour sealing
- Mineral wool: thicker, harder to fit in shallow joists
- Spray foam: expensive and permanent
- Phenolic: costly and brittle
Check joist depth and measure three times before you order
Lift a hatch or pull back the ceiling in one corner and measure the joist depth from the top of the ceiling to the underside of the roof deck. Write it down. Subtract 50 mm for the ventilation gap, and what's left is the maximum insulation thickness you can fit. If that number is less than 100 mm, rigid PIR won't meet Building Regulations on its own, and you'll need to add insulated plasterboard to the ceiling or accept a worse U-value.
Measure the joist spacing at three points along the roof: the spacing often varies by 20-30 mm, and rigid boards cut to fit one bay won't fit the next. Joists at 400 mm centres are common in older flat roofs, but 450 mm and 600 mm also turn up. Note the joist width too: 50 mm timber joists conduct less heat than 75 mm steel, and the extra width means you lose more insulation area to bridging.
Check for obstructions: pipes, cables, or joist hangers that reduce the usable depth. A soil pipe running along one joist line can drop the effective depth by 100 mm in that bay, forcing you to use thinner insulation or route around it. Pull the insulation back from any cables by 25-50 mm if they're not rated for contact with insulation, and don't pack insulation hard against a flue or a light fitting unless it's fire-rated for it.
Mark up a scale drawing with the joist layout, the measured depths, and the usable insulation space. Cut one test piece and fit it in the tightest bay before you order the rest. That ten-minute check will tell you if the boards are too thick, too thin, or if the joist spacing is irregular enough that you need batts instead. Order 10% extra to cover cuts, mistakes, and bays that turn out narrower than you measured.
- Measure joist depth in three locations with a steel tape measure, from ceiling surface to deck underside.
- Subtract 50 mm for the ventilation gap. The remainder is your maximum insulation thickness.
- Measure joist spacing at opposite ends of the roof and at the centre. Note the largest and smallest values.
- Check for pipes, cables, or fittings that reduce usable depth. Mark them on a sketch.
- Cut and fit one test board in the tightest bay before ordering materials for the whole roof.
Quick questions
Can I retrofit cold deck insulation without pulling down the ceiling?
Yes, if you can access the void from a hatch or by lifting a few deck boards from above. Push the insulation up between the joists from below, or lower it from above if you have roof access. You'll still need to fit a vapour barrier and check the ventilation gap, which is easier from above but possible from below with care.
What U-value should I aim for if my joists are too shallow for 0.18 W/m²K?
Fit the thickest insulation that leaves a 40-50 mm ventilation gap, then add 25-40 mm of insulated plasterboard to the ceiling below. A combined approach can hit 0.18 W/m²K even with 100 mm joists. Alternatively, accept 0.22-0.25 W/m²K if the roof is sound and you're improving from no insulation at all.
Does spray foam stop me needing a ventilation gap?
Closed-cell spray foam can eliminate the ventilation gap if it's applied thick enough to form an airtight seal and act as its own vapour barrier. Open-cell foam still needs a ventilation gap above it because it's vapour-permeable. Either way, check with the installer that they're designing for an unventilated cold deck, not just filling the space.
How do I know if my existing cold deck insulation has failed?
Check for visible mould, damp patches, or sagging insulation when you lift the hatch. Measure the ceiling surface temperature: if it's more than 5°C colder than the room in winter, the insulation is either missing, compressed, or wet. A musty smell or condensation drips in the void mean the vapour barrier or ventilation has failed.
Can I use leftover loft insulation in a cold deck flat roof?
Only if it's the right type and thickness. Loft roll insulation is usually 100-170 mm mineral wool, which works in a cold deck if the joists are deep enough and you fit a separate vapour barrier. Don't use it if it's been compressed, stored damp, or if you can't confirm the thickness. Rigid boards from a loft conversion won't work unless they're PIR or phenolic, not XPS or EPS.
What happens if I skip the vapour barrier?
Warm, moist air from the room below will condense on the cold deck, saturating the insulation and rotting the timber joists. You'll see drips, black mould, and eventually structural failure. The ventilation gap can't remove moisture fast enough if there's no barrier slowing it down. Every cold deck roof needs a vapour control layer on the warm side of the insulation, without exception.