Step-by-step instructions and essential checks for installing MVHR systems in typical UK homes to ensure proper function and energy-efficient ventilation.
To install a MVHR system, mount the main unit securely, connect insulated ducts to supply and extract points, wire the unit per local electrical codes, then commission by measuring airflow rates and testing controls. Each step ensures healthy airtight home ventilation.
On this page
- The short version
- How to physically install main MVHR components
- How to connect ductwork properly
- How to wire and power the MVHR unit
- How to commission and test airflow and controls
- How to ensure your MVHR installation keeps your home healthy and airtight
- How to install a MVHR system with confidence
- Questions people still ask
Part of our guide on how does an mvhr unit work
Follow a precise sequence of mounting, ducting, wiring, and commissioning steps with key checks to install MVHR systems correctly in airtight homes.
| Typical duct diameter | 125-160 mm |
|---|---|
| Airflow commissioning tolerance | ±10% design flow |
| Mounting clearance | 600+ mm around unit |
| Power supply | 230V fused spur |
| Commissioning tool | digital anemometer |
The short version
- Mount MVHR unit in accessible, insulated space with at least 600mm clearance.
- Use insulated, airtight ductwork sized per manufacturer guidance to avoid pressure losses.
- Wire MVHR to a dedicated fused spur with switched live and neutral connections.
- Commission by measuring supply and extract airflow within ±10% of design using an anemometer.
- Test controls including boost, timer, and heat exchanger function before final commissioning.
How to physically install main MVHR components
Start by selecting a location for the MVHR unit that is dry, warm, and easily accessible for filter changes and servicing. Typically, this is a utility room, loft space, or cupboard with at least 600 mm clearance around the unit to allow airflow and maintenance access.
Secure the MVHR unit to a sturdy wall or frame using vibration isolating brackets to reduce noise transmission into the living areas. The unit should sit level to ensure condensate drains properly from the heat exchanger.
Install condensate drainage pipework from the unit's drain connection to a suitable waste point. This pipe must maintain a continuous fall, usually around 1:40, to prevent water accumulating inside.
Keep the unit's enclosure sealed. Any gaps can reduce efficiency and allow unplanned air infiltration. Use expanding foam or gaskets where duct or pipe penetrates walls or floors at the installation location. People in this spot often ask about how to improve indoor air quality as well.
How to connect ductwork properly
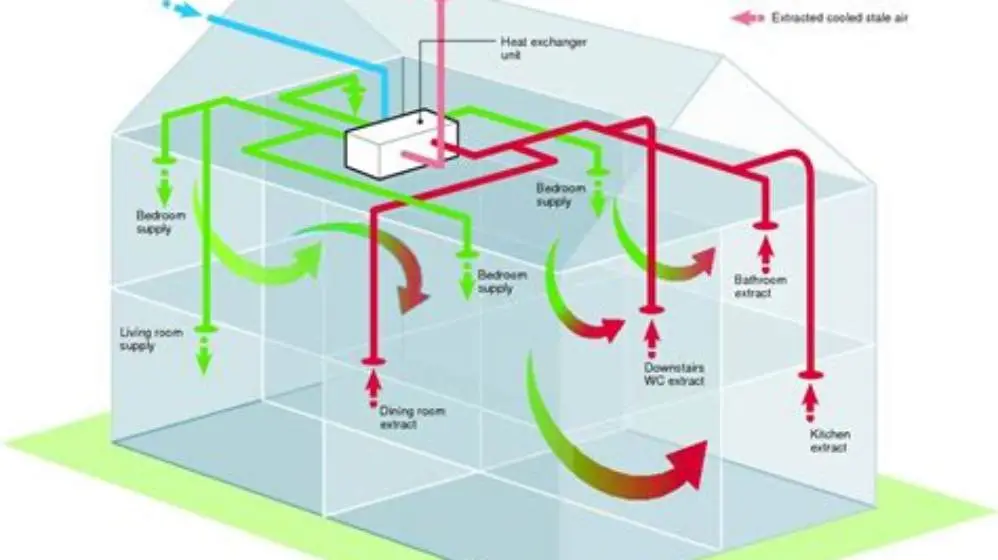
Use rigid, insulated ducting of 125-160 mm diameter, sized according to the MVHR manufacturer’s specification and calculated airflow rates. Flexible ducts cause pressure losses and should be minimized to short runs only.
Run separate ducts for supply and extract air, ensuring insulation is continuous and airtight to prevent heat loss and condensation inside the ducts. Connect ducts using airtight collars and seal joints with foil tape or mastic.
Use duct bends with generous radii to avoid increasing system resistance. Sharp bends can reduce airflow by up to 30%, depending on angle and radius, impacting efficiency. For the detail, see our notes on ventilation methods for condensation.
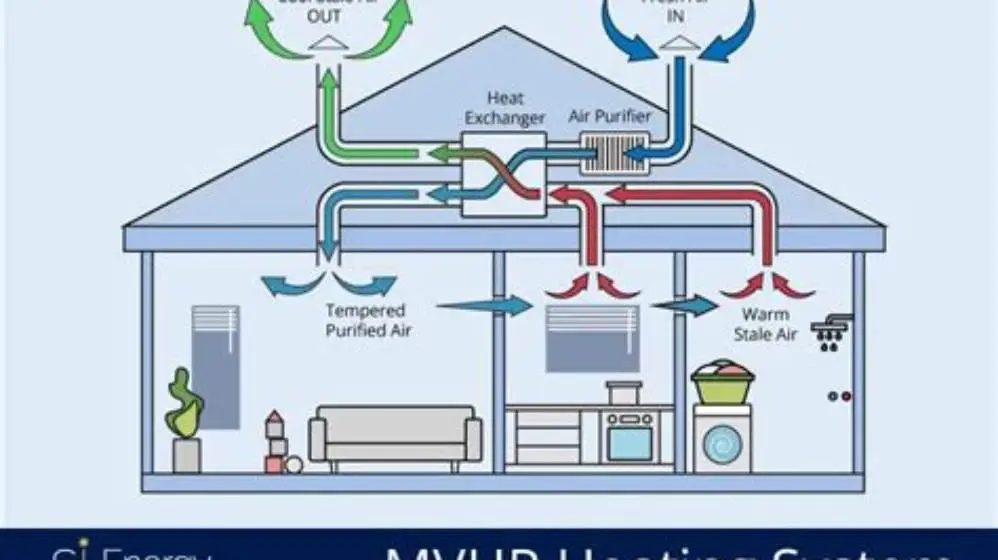
Label supply and extract ducts clearly to avoid cross-connection errors. Typically, supply air ducts deliver fresh, filtered air into living spaces, while extract air removes moist air from wet rooms.
- Duct insulation: minimum 25 mm thickness to prevent condensation.
- Duct sealing: foil tape or mastic required for airtight joints.
- Bends: use 90° bends with at least 4x duct diameter radius where possible.
- Supports: hang ducts every 1.2-1.5 meters to prevent sagging.

BTMETER BT-100 Handheld Anemometer
Measures wind speed accurately from 0.67 to 67.1 mph with ±2% accuracy, suitable for airflow verification in HVAC commissioning.
How to wire and power the MVHR unit
The MVHR unit requires a dedicated 230V fused spur connection, sized as specified in the unit’s electrical datasheet, commonly protected by a 3-6 amp fuse or circuit breaker.
Use fixed wiring with appropriate cable types, typically 1.5 mm² twin and earth, routed in conduit if required by building regulations for accessible areas. It helps to understand mvhr replacement filters purchase before going further.
Connect switched live, neutral, and earth conductors to the unit’s terminal block following the manufacturer’s wiring diagram exactly. Incorrect polarity or missing earth can cause faults or safety hazards.
Install any external controls such as boost switches, timers, or humidistats per the instructions, ensuring low-voltage control wiring is separated from mains power cables to avoid interference.
How to commission and test airflow and controls
Commissioning requires measuring airflow rates at supply and extract vents using a digital anemometer or flow hood under running conditions to ensure they match design targets within ±10%. If that sounds like your situation, read up on steam removal issues with bathroom fan next.
Check the pressure differential across the heat exchanger to confirm it is functioning properly. Abnormal readings can indicate blockages or fan failures.
Test all controls: verify the boost mode increases airflow as expected, timers operate correctly, and any humidity sensors trigger ventilation when moisture levels rise.
Record airflow, noise levels, and power consumption during commissioning for future maintenance reference and warranty compliance.
When testing airflow, also verify balanced ventilation by comparing total supply and extract airflow volumes; ideally, these values should be within 5% of each other to maintain neutral pressure in the home. Imbalance can cause drafts or pressure differences that impair airtightness and comfort.
Noise level checks are essential during commissioning. Measure sound pressure levels at key rooms near supply and extract vents with a sound level meter. Levels above 30-35 dB(A) may require duct or unit adjustments to reduce noise transmission, which can be achieved by adding sound attenuators or adjusting fan speeds.
If airflow measurements are off from the design targets, investigate possible causes such as incorrectly sized or installed ducts, blocked filters, or insufficient fan speeds. Adjustments during commissioning might include modifying fan speed settings or improving duct sealing. Confirm improvements by re-measuring airflow and pressure differentials to ensure system performance meets specifications.
- 1. Turn on the MVHR unit and set to normal running mode.
- 2. Use the anemometer at each supply and extract vent to measure airflow in litres per second.
- 3. Compare measured values against design specifications and adjust fan speeds if possible.
- 4. Activate boost control and confirm airflow increase.
- 5. Test humidity sensors and timer controls for correct operation.
How to ensure your MVHR installation keeps your home healthy and airtight
MVHR effectiveness depends on airtight building fabric and correctly installed ductwork to prevent heat loss and uncontrolled ventilation. Seal all penetrations and duct connections carefully.
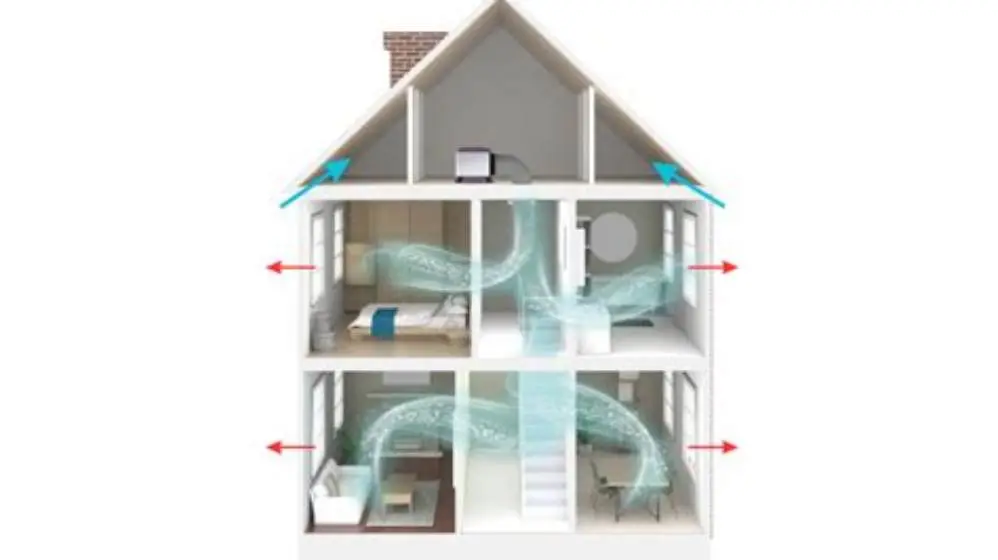
Ensure extracted air is taken from wet rooms prone to moisture, such as kitchens and bathrooms, while fresh air supplies reach living and sleeping areas to balance indoor air quality.
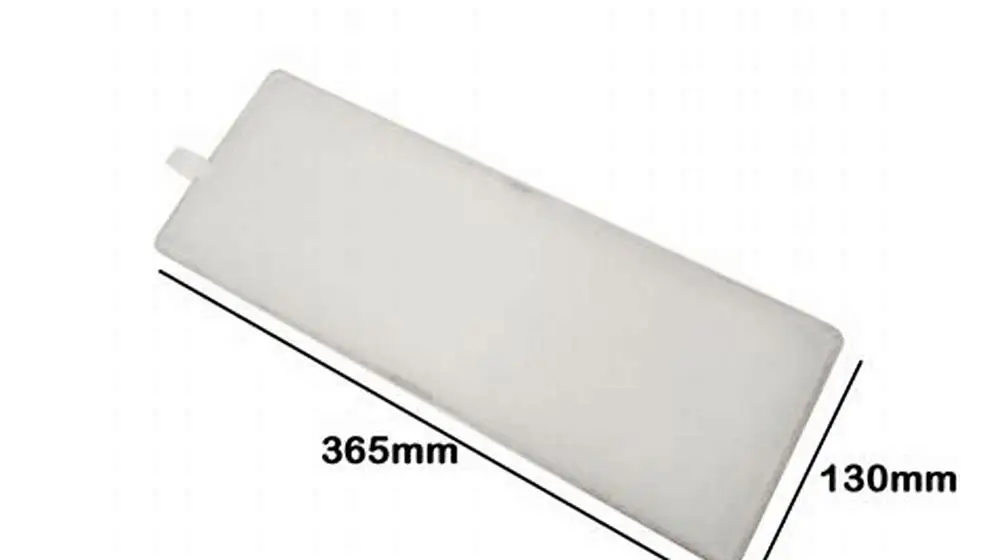
Regularly change filters, at least every 6-12 months, to maintain airflow and prevent contaminants entering your home.
Check condensate drainage annually to prevent blockages which can cause water damage or microbial growth inside the unit or ducts.
Airtightness testing of the building should ideally be done before MVHR installation using a blower door test, aiming for a target of under 3 m³/h·m² at 50 Pa. If the building is leaky, the MVHR system will struggle to maintain balanced ventilation, leading to inefficiencies and potential condensation problems.
Condensation can also form inside under-insulated or uninsulated ducts, especially in colder climates where duct surface temperatures fall below dew point. Using at least 25 mm insulation thickness is critical; in very cold locations, 50 mm insulation or duct heating cables may be necessary to prevent internal moisture issues.
Checking condensate drains involves running the unit during high humidity conditions and verifying water flows freely to the drain point without pooling. Blocked or poorly installed drains can cause water to back up inside the unit, risking corrosion and microbial growth, which compromises indoor air quality and equipment life.
- Airtightness: seal all MVHR and duct penetrations to under 3 m³/h·m² at 50Pa.
- Filter maintenance: replace filters according to manufacturer, usually 6-12 months.
- Condensate: maintain continuous fall and check for blockages yearly.
How to install a MVHR system with confidence
Installing a MVHR system requires a clear step-by-step approach that considers space, duct sizing, wiring, and commissioning. The system delivers balanced ventilation and heat recovery only if all parts work harmoniously.
If you follow the order (mount unit, connect ducts, wire power, then commission) you reduce common pitfalls like noise, insufficient airflow, or electrical faults.
You will need a digital anemometer (or flow hood) to verify airflow and a multimeter for electrical checks. These tools provide objective data before completing the installation.
Consult local building regulations and manufacturer installation guides. MVHR installation impacts air quality and energy efficiency, making professional commissioning a good investment.
Questions people still ask
Can I install a MVHR system myself without professional help?
You can physically install the unit and ducts if you have DIY skills, but electrical wiring and commissioning are best done by a qualified electrician or ventilation specialist to ensure safety and compliance.
What happens if the ductwork is not sealed properly?
Leaks reduce heat recovery efficiency, allow unfiltered air ingress, and can cause condensation and mold issues. All duct joints must be airtight using foil tape or mastic.
How often should filters be replaced in a MVHR system?
Filters typically need replacement every 6 to 12 months depending on usage and air quality. Regular changes maintain airflow and prevent contaminants entering the home.
Is a condensate drain always required for MVHR units?
Yes, most MVHR units produce condensate that must drain away to prevent water buildup and damage. The drain must have a continuous fall to a suitable waste outlet.
What tests confirm the MVHR system is working correctly?
Measuring airflow rates at supply and extract points with a digital anemometer, checking heat exchanger pressure differential, and verifying control functions confirm correct operation.