A soakaway crate collapses under a driveway load when the crate, cover system or supporting ground cannot carry repeated vehicle loads. Check the product grade, slab design and backfill before rebuilding.
On this page
- Quick recap
- Soakaway crate collapsing under a driveway load: what went wrong
- Take these immediate actions
- Decide whether an inspection is safe
- Diagnose the collapse in a fixed sequence
- Trace the crate grade before blaming the ground
- Check whether the cover system failed
- Check the backfill, soil and groundwater
- Match the repair to the vehicle load
- Rebuild it with a written installation record
- Quick questions
Part of our guide on low pressure water pump for garden
Quick facts
- First symptom
- A local dip, hollow or new puddle
- Crate grade
- Confirm from moulded markings and the product sheet
- Cover system
- Follow the crate manufacturer's drawing and local engineering guidance
- Backfill
- Use layers suited to the material and compaction method
- Traffic
- Restrict vehicles until the area is inspected
- Records
- Keep photographs, measurements and test results together
Quick recap
- Match the crate to the manufacturer's stated traffic or driveway loading conditions.
- Treat cover thickness and reinforcement as a designed system, not a guessed number.
- Compact backfill in layers suited to the material and equipment used.
- Restrict vehicles until the void and excavation are made safe.
- Keep one clear evidence pack for your contractor, engineer or insurer.
Soakaway crate collapsing under a driveway load: what went wrong
Sharp dip over the crate: missing or unsuitable load-bearing grade. The crate may have crushed beneath repeated wheel loads.
Broad, shallow sag: thin or missing cover slab. The cover may not have spread the load into the surrounding ground.
Settlement after rain or a long hollow along the drive: poorly compacted backfill. Loose fill can settle and leave the paving unsupported.
Take these immediate actions
Restrict vehicle access and mark the affected area. Keep people away from any open void or unstable edge. For the detail, see our notes on hopper head overflowing in heavy rain with clear downpipe.
Check for buried electricity, gas, water, drainage and communications services before excavation. Use local utility records and a suitable locating service.
Photograph the drive, dip, cracks, gullies and nearby structures. Measure the surface depression and note recent rain, vehicle use and the date the movement began.
Send the evidence to a drainage contractor or chartered structural engineer. Ask for a written temporary access plan before anyone removes paving. People in this spot often ask about steps for proper soakaway construction as well.
- Restrict traffic and people from the affected area.
- Check services before any excavation.
- Photograph and measure the failure from a safe position.
- Find the crate markings, installation guide and original drawings.
- Arrange a professional inspection where the structure or excavation is uncertain.
Decide whether an inspection is safe
A shallow surface check may be safe when the paving remains stable, there is no open void and you can work from firm ground. Lift a paving unit only if the surrounding surface does not move or crack.
Use remote assessment when the ground is hollow, wet, actively moving or close to a retaining wall or building. Send photographs, measurements and product documents to the contractor or engineer first.
Do not enter an excavation unless a competent person has assessed its depth, sides, ground condition and access. Depth alone does not make a trench safe. Unsupported sides, buried services, water and unstable fill can require shoring or battered sides. Before you commit to anything, it is worth looking at rainwater harvesting system uk cost and installation.
Stop and call an engineer if the crate is exposed, the cover has broken, groundwater is present, the excavation is deep enough to restrict escape, or heavy vehicles use the drive. The engineer can specify safe access and temporary support.
Diagnose the collapse in a fixed sequence
Start with the surface. Look for broken paving, open joints, cracks in a concrete cover, edge settlement and water collecting after rain. These signs help separate a structural failure from a blocked outlet.
A simple water test can show poor drainage, but it cannot prove the crate is sound. Pour water only where the surface is stable and keep it away from exposed services. Record where the water went and how the area responded. People in this spot often ask about choosing filters for rainwater tanks as well.
Expose the system only after the contractor has checked access and services. Lift paving carefully, then identify the bedding, sub-base, cover, membrane, sidefill and crate. Do not pull apart a damaged structure before it has been recorded.
Measure the dip, cover arrangement, apparent crate depth and distance to foundations and services. Record the crate code, soil condition, groundwater and damaged components in one evidence pack.
Give the pack to the contractor, engineer or insurer. Include the original drawing, delivery note, installation record, photographs, measurements and drainage-test result. For the detail, see our notes on sensor tap runs after hands removed.
Trace the crate grade before blaming the ground
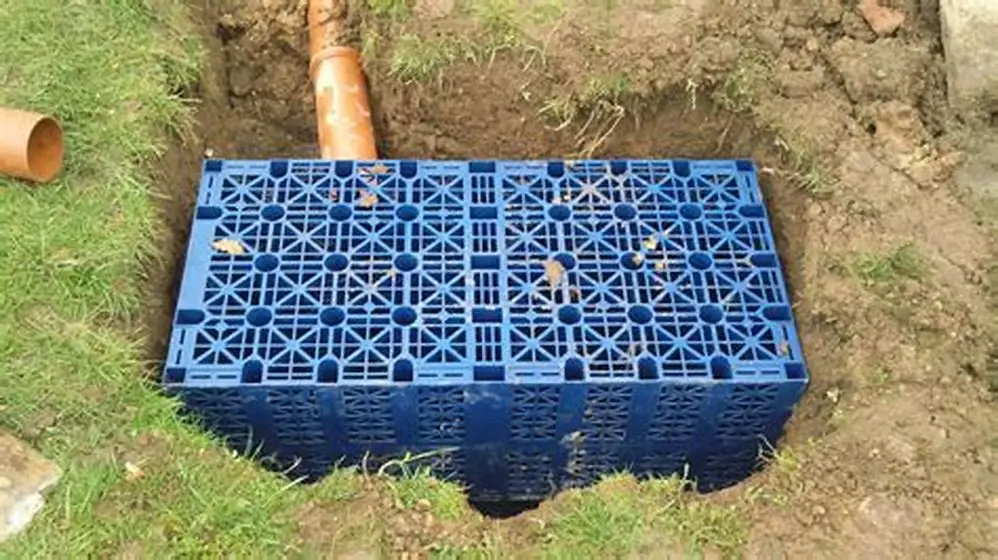
Crates sold for landscaping are not automatically suitable beneath vehicles. A traffic-rated product has a stated installed load condition linked to cover, soil, compaction and a defined vehicle use.
Do not rely on empty water volume or a sales title. Look for moulded letters, numbers, logos, arrows or batch marks on the panels and internal supports. Photograph every mark with a scale beside it.
Search the manufacturer's guide using the exact code. Ask the supplier to confirm the model, permitted traffic use and required surrounding materials in writing.
Traffic descriptions differ between products. A guide may separate pedestrian areas, domestic driveways, light vehicles and heavier traffic. Use the supplier's defined installation condition, not a load class copied from another product or standard.
Treat an untraceable crate as unsuitable for vehicle loading until an engineer confirms otherwise. Unknown products are usually safer to replace than reuse.
| Check | What to record | Why it matters |
|---|---|---|
| Moulded code | Every letter, number and logo | Links the crate to a model |
| Product guide | Traffic use and installation drawing | Defines the installed arrangement |
| Load wording | Vehicle type or stated class | Shows the intended traffic level |
| Internal structure | Posts, ribs and damage | Helps compare the physical product |
| Site conditions | Cover, soil and groundwater | Loading depends on installation |
Check whether the cover system failed
A vehicle applies load through a small contact patch. The load travels through the paving, bedding, sub-base and cover system before reaching the crate.
A concrete slab can spread this load, but its thickness, reinforcement, bearing and support need a design for the chosen crate and traffic. There is no safe universal slab thickness. Follow the manufacturer's drawing or obtain a structural engineer's design.
Check for a missing slab, cracked concrete, exposed reinforcement, poor bearing or a slab bridging unsupported ground. Crushed crate roofs with intact side panels can point towards inadequate cover or slab support.
Refer to the crate manufacturer's structural detail and any applicable local or national structural and drainage guidance. If concrete design is required, use the standard and design method named by the engineer. Do not copy a slab detail from another product.
Check the backfill, soil and groundwater
Backfill thickness depends on the material, moisture, trench width and compaction equipment. Follow the crate manufacturer's guidance or an engineer's specification.
If the guidance is unavailable, ask for testing and a design decision. Proctor testing can assess moisture and compaction characteristics, while CBR testing can help assess support for the pavement. The engineer should use the results to set layer thickness, equipment and acceptance criteria.
Ask the contractor to state the fill material, layer thickness, equipment and target compaction in writing. The correct equipment depends on the material and the space around the crate. A vibrating plate is not suitable for every fill or confined space.
Look for topsoil, rubble, wet clay, loose trench spoil, gaps beside the crate and an unprepared base. These conditions can settle or lose support after rain.
High groundwater can soften the formation or lift an empty crate. Made-up ground, soft clay and ground near foundations need a site-specific detail. Follow local drainage requirements for separation distances and discharge conditions.
Do not accept a claim that the fill was compacted without evidence. Request delivery records, the compaction method and test results relevant to the material and ground.
Match the repair to the vehicle load
List every vehicle crossing the area, including vans, caravans, delivery vehicles and plant. Note axle weights when the supplier or engineer requests them.
A domestic driveway detail may not cover a loaded van or occasional lorry. Repeated wheel passes can expose a weakness that a parked car never reveals.
Moving the crate outside the wheel path may reduce structural demand, but the new location must still meet drainage and property separation requirements. Confirm the layout before ordering materials.
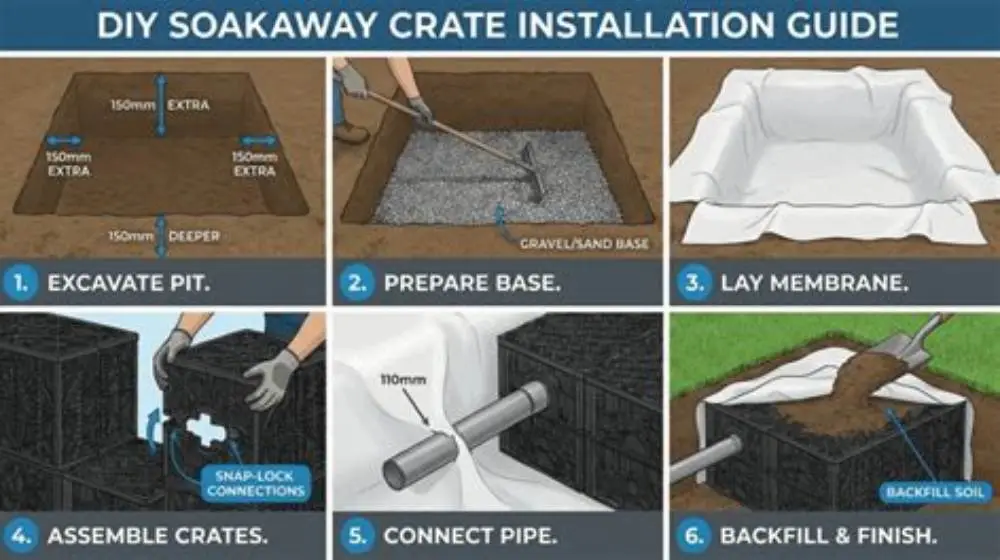
Use the exact replacement product guide. It should show the crate orientation, base, membrane or geogrid, sidefill, cover, surface build-up and permitted traffic condition.
Rebuild it with a written installation record
Put the crate model, traffic condition, cover design, fill specification and inspection arrangement on the quotation. Ask the contractor to identify the manufacturer's guide and local drainage advice used.
Use only materials named for the system. Follow the stated layer thickness and compaction method, since both vary with fill and equipment. Do not substitute garden-grade crates or unverified concrete details.
Keep the inspection point accessible and check drainage after heavy rain. A blockage and a structural collapse can look alike from the surface, so access matters.
Keep the completed evidence pack with the product guide, delivery records, method statement, test results and final photographs. This gives the next contractor a clear starting point.
A driveway soakaway lasts only when its crate grade, cover design and supporting ground match the actual vehicle load.
Quick questions
Can a normal soakaway crate go under a driveway?
Only when the manufacturer states vehicle suitability for the proposed installation. Confirm the model, traffic condition, cover and ground detail in writing.
How deep should the cover be?
There is no safe universal figure. Cover depth and any slab depend on the crate, soil, vehicle load and local guidance. Use the manufacturer's drawing or an engineer's design.
Is a sunken driveway always a collapsed crate?
No. Loose backfill, failed bedding, drainage blockage and poor trench support can all cause settlement. Surface shape helps narrow the cause, but inspection confirms it.
How do I identify the crate rating?
Photograph moulded codes and logos, then match them to the manufacturer's guide. Check the stated vehicle use and installation conditions, not just water volume.
Should I reuse a crate with no markings?
Treat an untraceable crate as unsuitable for vehicle loading. Ask a drainage or structural engineer before reuse, and normally plan for replacement.
When should I call an engineer?
Call one for deep or unstable excavations, soft or made-up ground, high groundwater, heavy traffic, damage near foundations or an unknown structural arrangement.