Understand how solar panels impact roof protection, leak prevention, and performance differences with in-roof tiles and mounted panels across roof types.
Solar panels can protect your roof by shading it from weather and UV but only if fixed correctly; improper mounts, especially on slate or flat roofs, risk leaks. In-roof tiles differ in coverage and performance from standard panel mounts.
On this page
- Key takeaways
- Do solar panels protect your roof and under what condition
- Solar panels on slate roofs: fixing methods and leak risks
- Comparing in-roof solar tiles versus mounted panels in performance and protection
- Flat roof solar PV mounting methods that prevent leaks
- What to check before reroofing with in-roof solar tiles
- How solar panels affect roof protection: long-term considerations
- Questions people still ask
Part of our guide on solar batteries for homes sizes how many kwh needed
Detailing how solar panels affect roof leak risk and protection with exact checks and comparisons for slate roofs, flat mounts, and in-roof tiles.
| Typical leak risk | Generally low with correct fixing and flashing; verify with pre- and post-installation inspections and moisture-meter readings |
|---|---|
| Power density in-roof tiles | Often 50–70 W/m² lower than mounted panels depending on tile design and module efficiency; compare installed watt-per-square-metre to measure |
| Flat roof mounts | Ballasted or non-penetrating systems avoid membrane breaches; check roof structural capacity before choosing |
| Slate roof fixing | Use hooks or special anchors sized to slate thickness and type; confirm compatibility before drilling |
| Panel lifespan | Commonly warrantied for 25+ years; expected life depends on degradation rate and manufacturer specs |
Key takeaways
- Proper fixing prevents leaks and protects roof integrity.
- Slate roofs need specialized mounting to avoid tile damage and leaks.
- In-roof solar tiles generally produce less power per square metre than mounted panels.
- Flat roof mounts require sealed fixing systems to prevent water ingress.
- Check sealing and flashing around panels or tiles before reroofing.
Do solar panels protect your roof and under what condition
Solar panels can physically shield your roof from rain, hail, and ultraviolet radiation, which may slow the weathering of the roof material in the shaded areas. Whether and how much protection occurs depends on roof type, how much area the panels cover, and the quality of the installation.
If panels are mounted with correct waterproof flashing and sealing, they keep water out around fixings and protect the roofing underneath. Conversely, poor installation can introduce leak points and negate protective effects.
The protective effect is proportional to panel coverage: typical residential arrays cover roughly 20–70% of a roof depending on system size and roof geometry. To estimate how much of your roof is shaded, measure the total roof area and the area occupied by panel modules; protection applies only to the covered area.
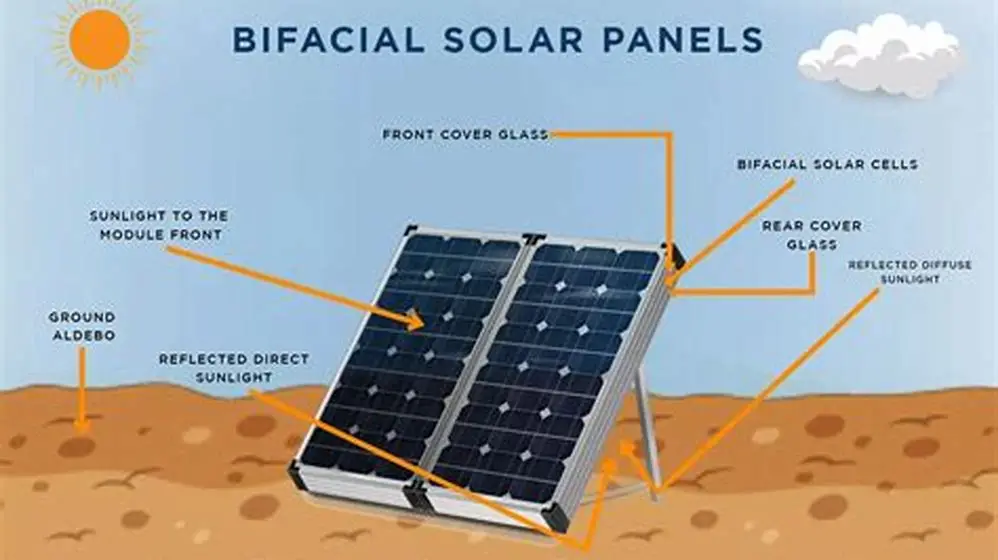
Shading by panels reduces peak surface temperatures and temperature swings on the covered substrate. Reduced thermal cycling can lessen cracking and material fatigue for susceptible materials (for example, some composite shingles). This is a buffering effect, not a replacement for routine roof maintenance. For the detail, see our notes on bifacial solar panel design.
The roofing material influences how much benefit shading provides. Asphalt shingles and composite tiles may show more reduced weathering from shading than metal roofs, which handle UV and thermal expansion differently. In hail-prone areas, panels can absorb or deflect some impacts, which may reduce direct hail damage to the roof beneath. Reported reductions in shingle granule loss beneath panels have varied; such reductions depend on local hail intensity, panel coverage, and panel mounting height. To assess this at your property, compare granule loss visible on exposed shingles with that found under panels during an inspection or at reroofing.
Example: on a 100 m² roof with panels covering 50% (50 m²), the shaded area will experience whatever slowing of degradation applies locally (for instance, reduced UV exposure or fewer thermal cycles). The overall roof-life extension is therefore partial and scales with coverage, local climate severity, and installation quality. Homeowners can confirm protective effects by documenting roof condition in both exposed and covered areas during periodic inspections or when panels are removed for maintenance.
Solar panels on slate roofs: fixing methods and leak risks
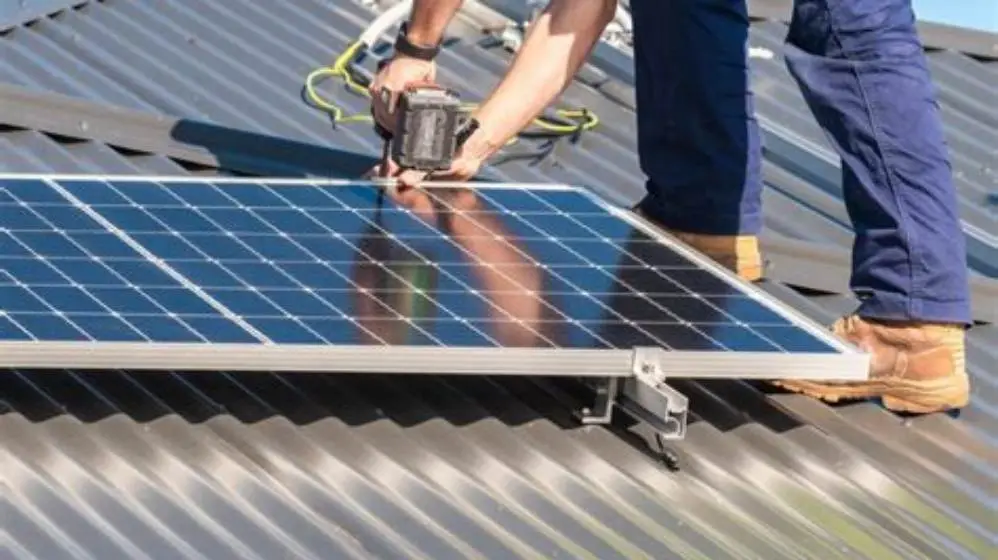
Slate roofs are brittle and require specialized fixing methods such as slate hooks or purpose-made anchors with rubber or EPDM collars to avoid cracking and to maintain waterproofing. Standard drilled fixings without collars increase the chance of damaging slates and allowing water ingress. Before you commit to anything, it is worth looking at solar light battery and panel checks.
A common approach is to replace a slate with a hook or a mounting bracket that supports the panel frame without forcing a load through a single slate. This reduces direct stress on slates and lowers the chance of leaks, but it raises installation complexity and cost.
Leak incidents are correlated with the type of fixing and whether waterproof collars or appropriate flashings are used. Leaks become more likely when drilled fixings lack waterproof collars or when slates are cracked during installation. To confirm sealing quality, perform a targeted water test: spray the area around fixings for 15 minutes while an assistant checks the attic or underlay for drips.
Regular inspections after installation are advisable because slate roofs can shift or flex slightly over time, which may loosen fixings. The other half of this decision is how do solar power batteries work.
Leak risk also depends on slate thickness and type. Thin slates (for example, under roughly 6 mm) are more likely to crack during drilled fixings, while thicker slates tolerate penetration better when collars are used. For a specific installation, measure slate thickness and select collars and bolts sized to that thickness; a qualified installer should confirm the combination before drilling.
When direct penetration is unavoidable, replacing selected slates with custom flashings or prefabricated metal saddles around anchors can provide a more reliable long-term seal than drilling alone. A recommended check is the post-installation water test described above; detecting moisture early allows resealing while the installer is still responsible for corrective work.
Tramex Roofing Master Kit RMK
Detects moisture conditions up to 152 mm depth in roofing and waterproofing systems, enabling early leak detection under roofing materials.
Comparing in-roof solar tiles versus mounted panels in performance and protection
In-roof solar tiles replace conventional roof tiles and form part of the roof covering. Because they cover the substrate directly, they can provide broad weather protection where they are installed and simplify flashing details around standard panel mounts.
In-roof tiles commonly produce less power per square metre than framed, mounted panels. Typical differences reported fall in the range of 50–70 W/m² lower output for in-roof tiles compared with mounted modules, but the exact gap depends on tile cell size, module efficiency, and the waterproofing details required.
Mounted panels commonly deliver in the order of 150–200 W/m² on typical residential roofs, depending on panel efficiency, tilt and shading. To evaluate your own roof, compare the nameplate wattage of installed modules divided by the module area (W/m²).
Waterproofing for in-roof tiles relies on the tile interlocks, underlay membranes, and proper integration with the roof structure. Proper installation is critical to prevent leaks; older roof structures may need reinforcement or underlay replacement to accept integrated systems.
Because in-roof tiles usually yield lower energy density, they may require 20–40% more roof area to reach the same output as mounted panels; the exact figure depends on the specific tile and panel models. That trade-off also affects protection: greater covered area increases the substrate that is shielded from weather, but increases installation complexity.
Thermal expansion and differential movement between solar tiles and adjacent conventional tiles must be managed. If joints are not sized and installed to accommodate seasonal movement, micro-gaps can form and permit moisture ingress. A practical check is to inspect tile joints after periods of strong temperature change and to look for staining or moisture in the roof void.
| Feature | In-roof Solar Tiles | Mounted Solar Panels |
|---|---|---|
| Power Output per m² | Generally 80–130 W/m² (varies by tile design) | Typically 150–200 W/m² (varies by panel efficiency) |
| Roof Protection | High where tiles cover substrate (dependent on correct installation) | Moderate — protection only where modules cover roof and around mounts |
| Installation Complexity | High (roof replacement or overlay often needed) | Medium (mounts attached to existing roof structure) |
| Leak Risk | Low if correctly installed and integrated with underlay | Low with proper flashing and sealing around penetrations |
| Aesthetic Integration | High (tiles replace roofing material) | Moderate (mounts and frames visible) |
- Well integrated with roof appearance
- Good waterproofing if installed correctly
- Covers and protects substrate across installed area
- Lower power density
- Higher installation cost
- May require roof replacement or overlay
Flat roof solar PV mounting methods that prevent leaks
Flat roofs require special attention because membrane penetrations are a common source of leaks. Non-penetrating solutions or properly flashed penetrations matched to the membrane type reduce leak risk.
Ballasted mounts use weighted frames that sit on the roof membrane without penetration, preserving the membrane. They trade off increased dead load, so you must confirm the roof structure can support the added mass.
When penetrations are required, each fixing must have a waterproof flashing or collar specifically designed for the roof membrane (for example, EPDM, TPO, PVC). These flashings should be compatible with the membrane and properly integrated and sealed.
To evaluate leak risk on your flat roof, use a moisture meter and periodic interior inspections. Perform an exterior water test where feasible, and document membrane condition before and after installation. With correct design and maintenance, leak incidents can be kept low, though rates vary by mounting choice and installer quality.
- Ballasted mounts: no penetration, lower leak risk, heavier dead load
- Penetrating mounts: require compatible flashing collars and professional installation
- Regular maintenance: check seals at least every 3–5 years
What to check before reroofing with in-roof solar tiles
Before reroofing with in-roof solar tiles, confirm the roof structure is sound, the chosen tiles are suitable for local weather conditions, and that your installer has experience with integrated systems.
Verify the underlay membrane is intact and specified for solar tile installation; manufacturers typically require a high-performance underlay rated for UV exposure and long-term weathering.
Check that roof pitch is within the manufacturer’s recommended range (many integrated tiles work best between about 15° and 60°). Very low or very steep pitches affect both waterproofing and energy production.
Plan wiring runs, junction box locations, and roof ventilation so they do not compromise waterproofing. Ensure cable penetrations are routed and sealed per both roofing and electrical best practice.
- Inspect roof structure for rot or damage
- Verify underlay membrane specification
- Confirm roof pitch suitability
- Plan cable routing and junction box placement
- Engage a certified installer experienced with solar tile systems
How solar panels affect roof protection: long-term considerations
Over the expected 25+ year life of many solar modules, a properly installed array can reduce UV exposure and lessen temperature swings on covered roof areas, which may slow material degradation there.
Panels add weight and change wind loads on the roof, so structural assessment is essential. If the roof cannot carry the additional load or if fixings are poorly distributed, deformation or failures can occur over time.
Modules and frames can trap debris or hold moisture if not inspected and cleaned, which may accelerate localized wear under the panels. Leave access for inspection and cleaning when designing the array layout.
Routine inspections every few years should include checking seal integrity, clearing debris, and verifying that flashing and collars remain intact. Use moisture meters, thermal imaging, or attic inspections to detect early signs of water ingress so small issues can be repaired before they become serious.
Questions people still ask
Do solar panels cause leaks on roofs?
Solar panels do not inherently cause leaks when installed to appropriate roofing and waterproofing standards. Leak risk increases with poor flashing, seal failure, or inappropriate fixing methods, particularly on fragile roofs like slate.
Are in-roof solar tiles better for roof protection than mounted panels?
In-roof solar tiles can offer more integrated waterproofing because they replace roofing materials, protecting a larger substrate area. They usually produce less power per square metre and require more complex installation, however.
Can solar panels be installed on flat roofs without causing leaks?
Yes. Using ballasted mounts or properly flashed penetrating mounts with membranes matched to the flashings can prevent leaks. Regular maintenance and membrane inspections are needed to maintain seal integrity.
How do you fix solar panels on slate roofs without causing damage?
Use slate hooks, replacement-slate mountings, or anchors with waterproof collars sized for the slate thickness. Avoid drilling into slates without collars and have a qualified roofer confirm compatibility.
What maintenance is needed to keep solar panels from damaging the roof?
Routine inspections every 3–5 years to check sealants, flashing, and to remove debris help prevent leaks and reduce material degradation beneath panels.