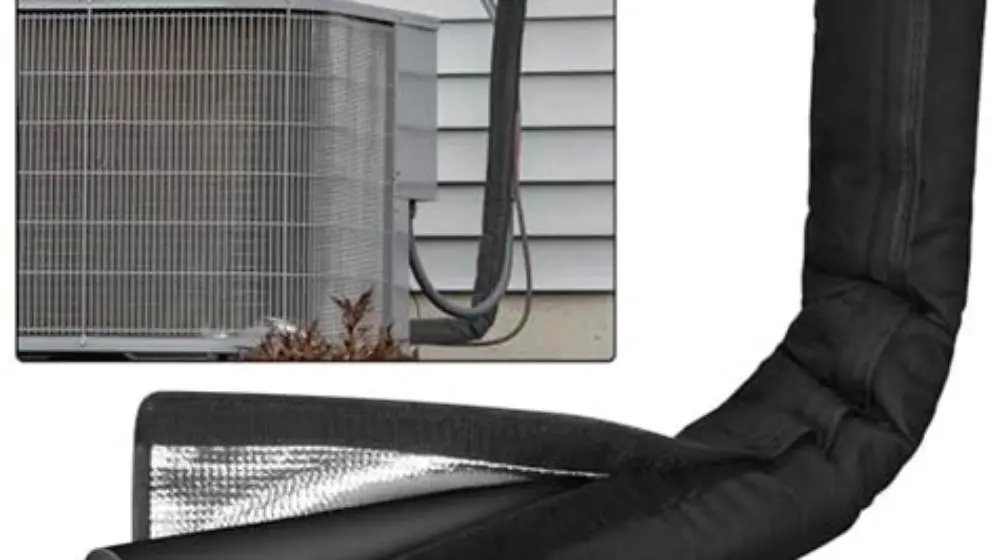
Use closed-cell foam made for outdoor use and size thickness per BS 5422 or the pipe maker’s heat-loss calculation. Many UK pre-insulated flexible pipes are supplied at about 25 mm wall, but required thickness depends on pipe diameter, fluid temperature and local design temperature. Check the datasheet for declared lambda at mean temperature per BS EN 12667 and add a weatherproof jacket.
On this page
Part of our guide on staged home retrofit
Quick facts
- Insulation thickness
- Varies - size per BS 5422 or maker calc; 25 mm common on pre-insulated coils
- Material type
- Closed-cell foam rated for outdoor use
- Design temperature
- -3 to -5 °C lowland UK; colder in upland/Scotland - check local data
- Protection needed
- UV-stabilised jacket with sealed, lapped joints
- Common pipe diameter range
- 15-28 mm - check your heat pump manual
- Weatherproofing layer
- UV-stabilised PVC, aluminium or EPDM - per maker spec
Quick recap
- Pick closed-cell foam rated for outdoor use and check its datasheet lambda per BS EN 12667.
- Size thickness per BS 5422 or maker calculation by pipe diameter, fluid temperature and design outdoor temperature.
- Use a weatherproof outer jacket and keep joints and end caps fully sealed.
- Do not compress foam and follow maker instructions to keep declared thickness.
- Stage work by risk if needed and keep records of products and photos for compliance.
Pick foam rated for outdoor use
Choose closed-cell foam made for outdoor heat pump pipes. It resists water uptake and keeps its shape when wet. You need this in UK frost and rain.
You will see two main options in UK merchants. Closed-cell polyethylene and elastomeric foams both work outdoors when protected. Check the datasheet for declared lambda at mean temperature per BS EN 12667. Values vary by product and density, so use the maker’s figure for your calculation.
Avoid open-cell foam, fibreglass or mineral wool outside. They soak water, then freeze and lose performance. If you have them now, plan to replace them.
| Material | Water Resistance | Thermal Performance Note | UV Resistance | Cost Range |
|---|---|---|---|---|
| Closed-cell polyethylene foam | High | Check datasheet lambda per BS EN 12667 | Moderate to high with jacketing | Low to moderate |
| Elastomeric foam | High | Check datasheet lambda per BS EN 12667 | High with jacketing | Moderate |
| Fibreglass | Low | Not for outdoor use | Poor | Low |
| Open-cell foam | Low | Not for outdoor use | Poor | Low |
Size thickness to your pipe and design temperature
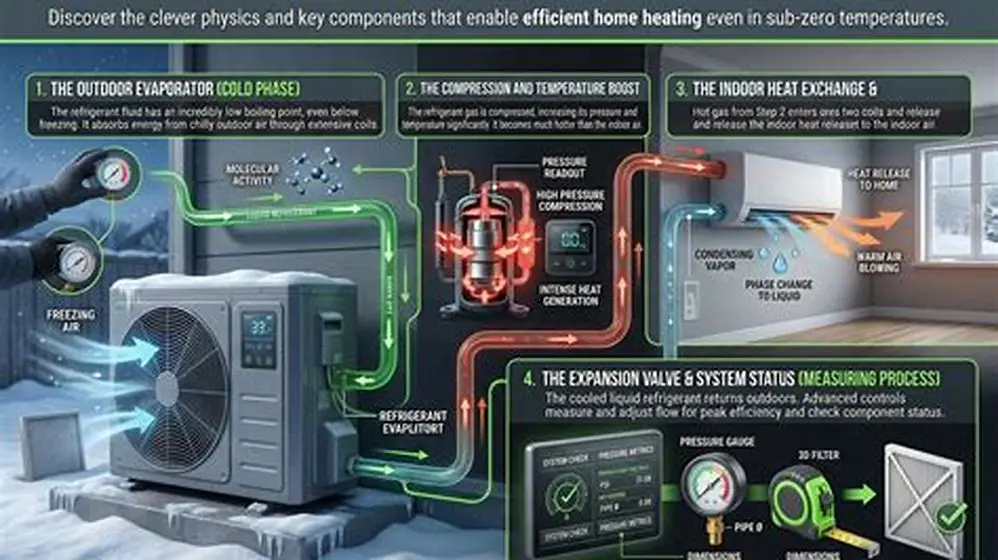
Thickness is not one size for all homes. It depends on pipe diameter, fluid temperature and local design outdoor temperature. Size it per BS 5422 or the maker’s heat-loss calculation. MCS guidance points to the same method for heat pump pipework. If that sounds like your situation, read up on how does a heat pump extract heat from cold air next.
Many UK pre-insulated flexible pipes are sold with about 25 mm wall. This suits many domestic runs, but it is not a rule for every case. A small 15 mm copper pair at 35 °C flow needs less than a 28 mm primary water run at 55 °C. Exposed, windy or long runs need more.
Use a verifiable design temperature. UK lowland winter design temperatures are typically -3 °C to -5 °C, colder in exposed upland or Scottish locations. Check your local design temperature in CIBSE Guide A or your heat pump manual. Then pick thickness which keeps the fluid above freezing at that temperature.
- Measure pipe outside diameter and exposed length.
- Note flow temperature and fluid type from the heat pump manual.
- Look up local design outdoor temperature.
- Run BS 5422 or maker heat-loss calc to pick wall thickness.
- Buy foam and jacket rated for outdoor use to that thickness.
Fit and seal the run so it stays dry
You want a continuous, unbroken layer. Cut foam to fit tight at bends and valves, then seal joints with the maker’s tape or adhesive. Keep the vapour barrier intact on cold lines. If that sounds like your situation, read up on why does my retrofit insulation still feel cold after airsealing next.
Add a weatherproof outer jacket made for outdoor use. Options include UV-stabilised PVC, aluminium or EPDM jackets rated for external pipework. Lap joints downward so rain sheds, seal laps per maker instructions and check fire rating where pipes pass near boundaries.
Do not compress insulation to make it fit. Compression cuts thickness and thermal resistance. Follow maker guidance to keep declared thickness. Leave a slight fall on horizontal runs and add drain points so water does not sit under the jacket.
Work to the maker’s instructions and keep them on file. Note tolerances for joint gaps and clip spacing. You will check them at inspection. Measure twice. Before you commit to anything, it is worth looking at spray foam insulation in loft sagging after a year.
- Seal joints and end caps with maker-approved tape or adhesive.
- Use UV-stabilised, waterproof jacketing with lapped and sealed seams.
- Keep thickness even and support pipes so foam does not crush.
- Keep a fall on horizontal runs and keep drains clear.
Match the method to your pipe type and frost risk
Heat pumps have three outdoor pipe types. Refrigerant lines are copper pairs, primary pipes carry water or glycol, and the condensate drain carries water to waste. Each needs its own approach.
Refrigerant and primary pairs often come as pre-insulated flexible systems with twin pipes inside a corrugated HDPE outer and factory foam. Use the system’s own fittings and end caps to keep the outer watertight. For site-applied foam on copper or plastic, match thickness to the hotter flow temperature.
Condensate drains freeze first. Keep them short, well fallen and insulated, or route them inside where you can. Heat trace is for drains or exposed water lines at real risk, not for every install. People in this spot often ask about hot water recirculation retrofit plumbing checks as well.
Add heat trace only when calculation shows risk or the drain has frozen before. Use a self-regulating cable with a thermostat set around 3 °C to 5 °C, often 10 to 15 W per metre but follow the cable maker’s data. Control it with a frost thermostat and RCD protection, and never wrap it over compressed foam.
Check current DESNZ and Ofgem guidance before you claim funding. Pipe insulation alone is not typically eligible under ECO4 or the Boiler Upgrade Scheme. Do not claim funding without a citation and link to the scheme document.
Stage the work to control cost and disruption
You can split the job if budget or access is tight. Start with the most exposed run, such as a long north-facing wall or a shaded alley. You get the biggest frost protection for the smallest outlay. Before you commit to anything, it is worth looking at internal wall insulation plasterboard bubbling after external wall insulation.
Do the rest during planned service or other retrofit work. Use foam tubes with clips or overlapping seams you can extend later. Avoid rigid glued systems you cannot adjust without damage.
Keep records for compliance. Note product names, thickness, datasheet lambda, photos of joints and jacket laps. You will need them for MCS paperwork or warranty.
- Insulate most exposed pipes first to reduce risk fast.
- Schedule remaining insulation during other retrofit works.
- Choose flexible insulation for easy upgrades.
- Keep records for compliance and warranty.
| Stage | Focus | Benefit | Consideration |
|---|---|---|---|
| Stage 1 | Most exposed pipes | Immediate frost protection | Lower upfront cost |
| Stage 2 | Remaining pipes | Complete energy saving | Requires planning |
| Stage 3 | System upgrades | Integration with other works | Keep records |
Fix the faults you find on inspection
Gaps at joints and thin spots at bends cause most failures. Water gets in, then freezes and lifts the foam. Replace short or crushed sections rather than patching over them.
Run a yearly check in autumn. Look for cracked jackets, open laps, missing end caps and sagging clips. Check fall and drains still clear. Re-seal or replace where the vapour barrier is torn.
Use the maker’s checklist and tolerances. Note allowed joint gaps, tape overlap and clip centres. Keep photos and fix issues before frost arrives. Small fixes now save big repairs later.
- Gaps at joints - re-cut and re-seal with maker tape.
- No jacket or open laps - add UV-stabilised jacket and re-lap.
- Crushed foam - replace and re-support to keep thickness.
- Blocked fall or drains - clear and re-set fall.
Quick questions
Can I use foam insulation meant for indoor pipes outside?
No. Indoor foam often lacks UV and moisture rating. It breaks down outdoors and lets pipes freeze. Use foam and jacket rated for external use.
Is thicker insulation always better for outdoor pipes?
Not always. Pick thickness per BS 5422 or maker calc for your pipe and design temperature. More helps on long or windy runs, but gains taper off.
Should I add heat trace cables to insulated pipes outdoors?
Only where risk is real, such as a condensate drain which has frozen or a very exposed water line. Use a self-regulating cable, 3 °C to 5 °C thermostat, and RCD protection per maker instructions.
How do I check if my pipe insulation qualifies for grants?
Check the current DESNZ and Ofgem scheme documents for scope and evidence rules. Pipe insulation alone is not typically funded. Keep datasheets and install photos.
Can I insulate already frozen pipes?
No. Thaw them safely first and fix the cause. Insulating over ice traps it and can burst pipes.