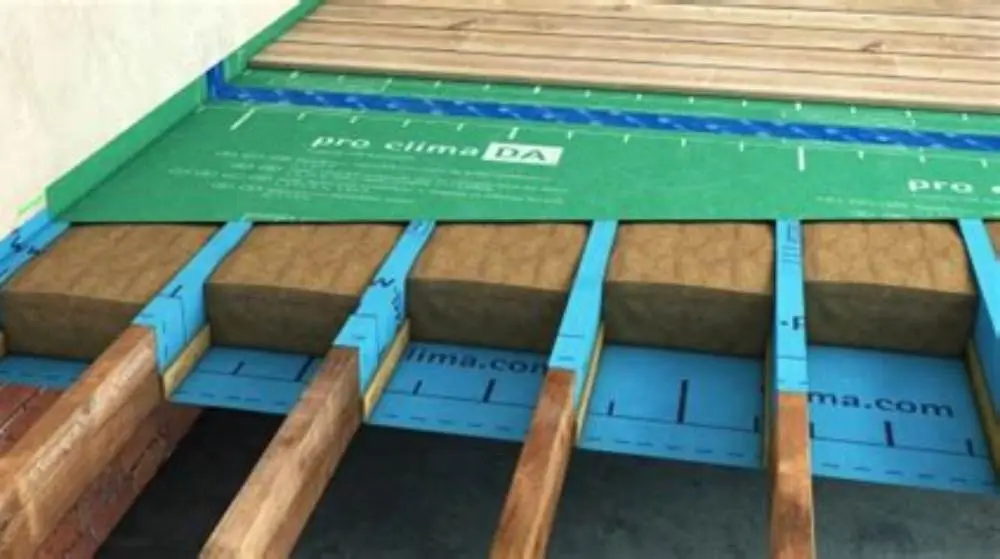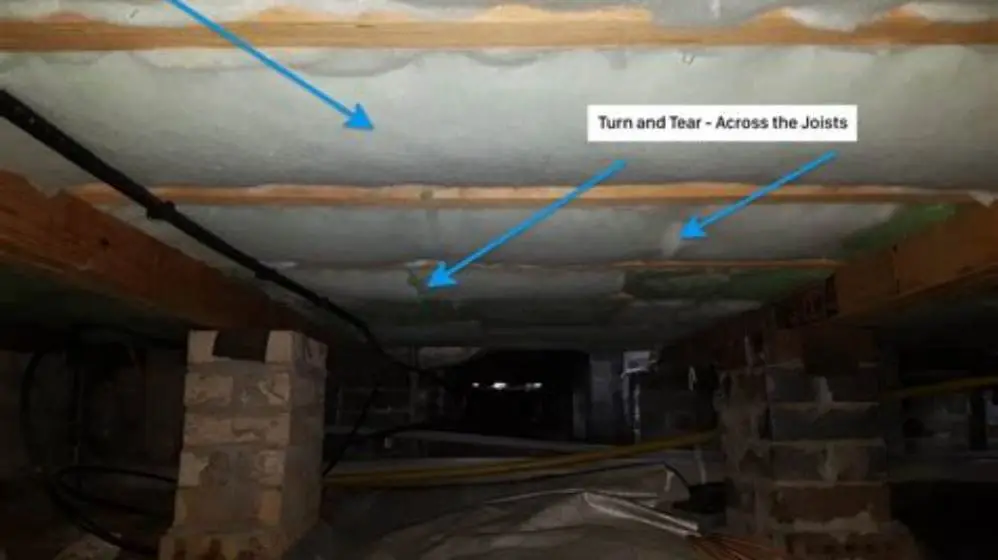
Fit insulation snugly between suspended timber joists from below, support it so it touches the floorboards without gaps, and keep air bricks clear for ventilation; use mineral wool or wood fibre batts sized to your joist depth, held with netting or battens, to reduce draughts and avoid trapping moisture.
On this page
Part of our guide on materials for floor insulation
Quick facts
- Typical thickness
- Based on joist depth, commonly 100-150mm
- Joist centres
- Commonly between 400mm and 600mm
- Void needed
- Must have ventilated void, measure void height to confirm
- Air bricks
- Must stay clear for ventilation
- Time for 20m²
- Varies by void height and access; allow several hours per bay
- Result
- Warmer floor, fewer draughts
Quick recap
- Only suspended timber floors with ventilated voids suit joist insulation. Concrete floors need rigid insulation above.
- Fit insulation to fully fill the joist cavity without compression, supporting it so it stays snug against floorboards.
- Maintain cross-ventilation by keeping air bricks clear and avoid blocking airflow under the floor.
- Seal gaps around edges, joist ends and penetrations to stop heat loss through draughts.
- Consider professional help for low voids, damp issues, or when Building Regulations apply.
Check if your floor suits joist insulation first
Suspended timber floors with a ventilated void underneath suit joist insulation. Confirm this by lifting a floorboard or inspecting through an air brick. You should see joists spanning wall to wall with visible airflow beneath. Concrete or solid floors lack this void and require insulation above the slab.
Measure the void height, joist depth, and joist spacing, typically 400mm or 600mm centres. Check for signs of damp, rot, woodworm or unsafe wiring. Address leaks, treat timber, and ensure electrical safety before installing insulation. Clear any blocked or missing air bricks to preserve ventilation.
Test for draughts by holding a tissue near skirting boards on a windy day. Movement indicates air leaks through the floor, so sealing and insulation help most here. If the floor feels cold only in spots, there may be gaps or missing insulation rather than widespread draughts.
- Suspended timber floor with ventilated void: suitable for joist insulation.
- Concrete slab or solid floor: no void present, needs insulation above.
- Mixed-level floors: treat each part according to its type.
- Floors over basements or cellars: easier access from below allows fitting insulation underneath.
| Floor type | Suitable | Recommended insulation method |
|---|---|---|
| Suspended timber with ventilated void | Yes | Insulate between joists from below or above |
| Solid concrete ground floor | No | Insulate over slab with rigid boards |
| Timber over unheated cellar or basement | Yes | Insulate from below, easier access |
Pick the insulation for your weather and budget
Use insulation batts sized to your joist depth without compression. Thickness depends on joist size and your target U-value, which varies by floor type, build-up, and building regulations. Check current guidance like Approved Document L for targets applicable to your project. There is more on installing insulation in tight spaces in a separate guide.
Mineral wool batts are common for DIY: affordable, flexible, and tolerant of some moisture, but they sag if unsupported and require netting. Wood fibre and sheep wool batts manage moisture better and feel nicer but cost more and still need support. Rigid PIR boards offer higher thermal resistance per millimetre but require precise cutting and fully sealed edges to prevent draughts.
Choose insulation based on void height, budget, and moisture risk. Deep joists often suit full-fill mineral wool. Shallow joists or limited headroom may suit thinner PIR boards. Homes with moisture issues or coastal exposure benefit from materials that buffer moisture. Check fire rating and avoid foil facings that trap moisture against timber.
- Mineral wool: economical, easy to cut, needs netting or battens to hold.
- Wood fibre: denser, better at moisture buffering, higher cost.
- Sheep wool: breathable, requires moth treatment.
- PIR board: compact, needs perfect edge sealing to avoid air leaks.
| Material | Typical thickness | Moisture handling | Fit difficulty |
|---|---|---|---|
| Mineral wool | 100-150mm | Moderate, sags if damp | Easy, cut slightly oversize |
| Wood fibre | 100mm | Good, buffers moisture | Medium, denser to cut |
| PIR board | 50-75mm | Poor if gaps remain | Hard, must seal edges |
- Mineral wool: low cost, forgiving to fit.
- Wood fibre and wool: better for damp-prone joists.
- Mineral wool sags without support.
- PIR boards require perfect edge sealing to avoid leaks.
How to install floor joist insulation step by step
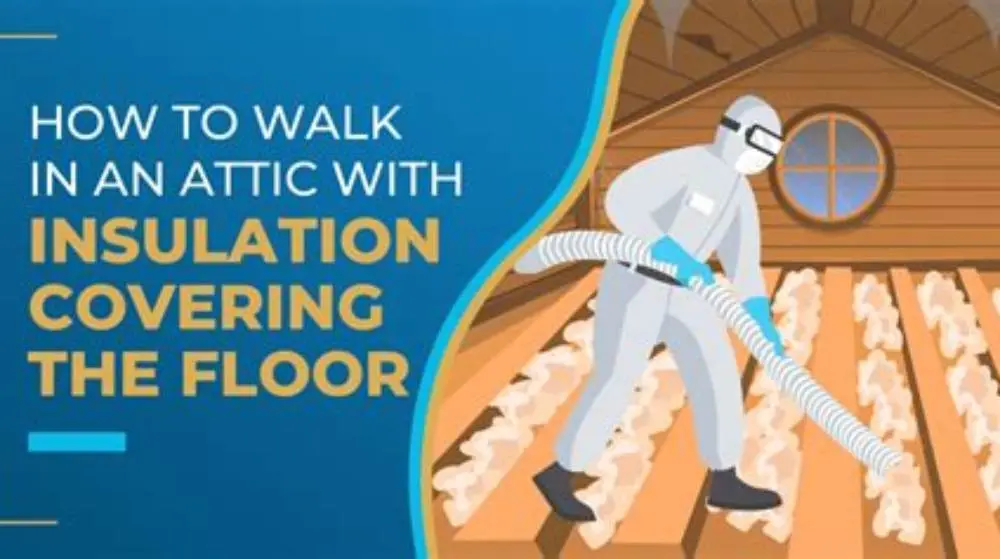
Prepare 2-3 joist bays before unrolling insulation to reduce waste and speed fitting. Work bay by bay, fitting batts tightly against the underside of floorboards with no gap above. Gaps create cold channels and reduce effectiveness. People in this spot often ask about materials for walkable attic as well.
Support the insulation using breather netting or polypropylene mesh stapled to joist sides, or timber battens screwed beneath joists for heavier batts. Avoid chicken wire that can damage insulation or foil that blocks moisture movement.
Wear protective gear such as mask, goggles and gloves. Older voids can be dusty and mineral fibres irritate skin and lungs. Isolate electrical circuits if cables run through joists. Keep downlights and transformers clear of insulation unless rated for coverage. Ensure air bricks and vents remain open.
- Clear the void: remove debris, inspect joists for damage, vacuum dust, and arrange pipes and cables to one side of bays.
- Measure and cut: measure each bay at multiple points, cut batts about 10mm oversize in width, and length to fit tightly end to end.
- Fit insulation: push the batt firmly against the floorboards with no gap above and no compression or folds.
- Support insulation: staple breather netting or fix battens at intervals of 300-400mm beneath joists to hold insulation securely.
- Seal edges: fill gaps around walls and joist ends with offcuts or flexible sealant; tape PIR board joints if used.
- Check services: leave wiring and pipes accessible, do not cover junction boxes or downlights that require ventilation.
- Inspect ventilation: confirm airflow underneath the entire floor from air brick to air brick remains unobstructed.
Seal the gaps that waste the heat
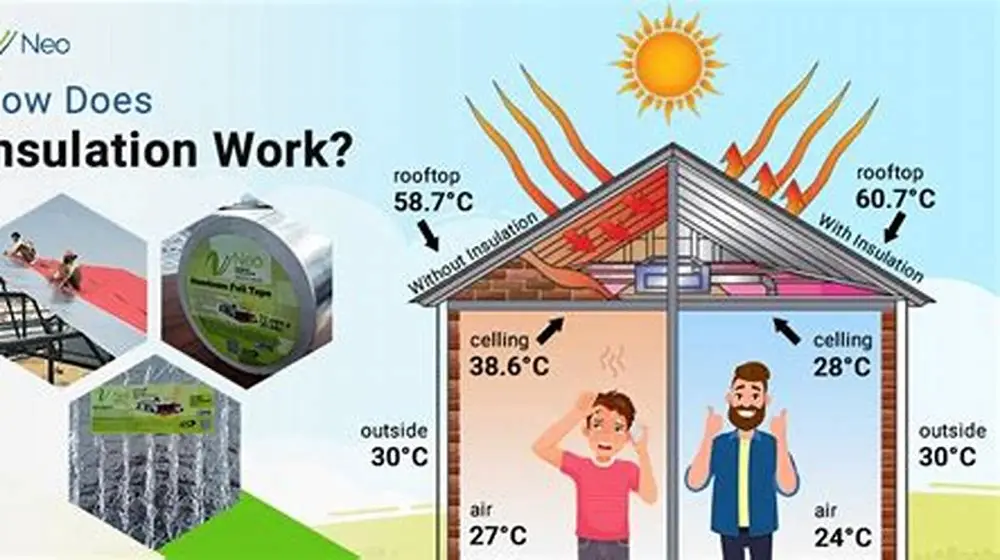
Small gaps around skirting boards or pipes can leak more heat than an insulated bay. Draught-proofing stops air loss while insulation slows heat loss through boards. You need both for best results. We go through how home insulation works step by step elsewhere on the site.
Start sealing at the perimeter. Carefully lift beading or edge boards, then push thin strips of wool or apply flexible sealant between the last joist and wall. Do not block the ventilated void below; seal only the floor-wall junction. Use flexible acoustic or flooring sealant that moves with timber.
Seal penetrations such as pipes, cables and hatch edges with collars or insulation strips plus a bead of sealant. If using PIR boards, tape all joints and foam gaps with low-expansion foam. For wool, ensure batts meet tightly with no visible gaps. Test again with a tissue to detect any remaining draughts.
- Seal wall-floor junctions with wool strips and flexible sealant.
- Pack joist ends in pockets with insulation but keep wall vents clear.
- Collar pipes and cables with insulation and seal, keeping them accessible.
Keep joists dry and avoid damp after insulating
Timber remains sound if moisture content stays below levels often cited by timber industry guidance (commonly under 20% measured with a pin meter at joist surfaces), but risk also depends on species, duration of exposure and ventilation quality. This balance relies more on ventilation than insulation itself. The other half of this decision is choosing insulation for roof types.
Maintain cross ventilation by keeping air bricks clear and ensuring a clear airflow path beneath the insulation, as required by Approved Document C. Do not block air bricks or fill the void with debris. In very damp or flood-prone sites, consider a breathable membrane above the insulation to allow moisture escape downward.
Check after about a month by lifting a floorboard and inspecting joists and insulation. Dry joists and fluffy insulation indicate success. Damp patches, musty smells or flattened batts show moisture ingress or poor ventilation. Fix gutters, ground levels and missing air bricks before adding further insulation. Seek expert advice if a breathable membrane is installed under boards to avoid trapping moisture.
- Avoid plastic sheets under joists; they trap moisture.
- Keep airflow clear beneath insulation to air bricks as per Building Regulations.
- Treat any rot or woodworm before covering joists; you won’t see it afterward.
Decide when to DIY and when to get a contractor
DIY suits floors with a clear void of at least 400mm, sound joists, and easy access such as from a hatch or cellar. Time varies depending on void height and access, so allow several hours per bay. Expect slower progress in low voids or tight spaces. Before you commit to anything, it is worth looking at signs insulation needs replacing.
Low voids under about 150mm, extensive rot, asbestos presence, or complex wiring call for professional help. Contractors bring tools, safety measures, and can handle Building Regulations compliance. In England and Wales, floor insulation is a controlled fitting requiring compliance with thermal and ventilation standards. Professionals often provide before-and-after photos, ventilation plans, and guarantees.
Grants like ECO4 may fund floor insulation for eligible households, and landlords can use them to improve EPC ratings. The Boiler Upgrade Scheme excludes insulation, but local Warm Homes schemes might assist. Check your local council and energy supplier for current eligibility before paying. Get multiple quotes, comparing thickness, material, and ventilation plans beyond price alone.
- DIY suits clear voids, stable timber, and confident DIYers.
- Contractors suit low or no access, damp risk, listed buildings, or certification needs.
| Route | Best for | Considerations |
|---|---|---|
| DIY | Clear void, small jobs, budget-limited | Dust, electrical safety, thorough sealing |
| Contractor | Whole house, low void, damp problems | Proof of compliance, guarantees, ventilation plans |
- DIY: lower labour cost, control over detail.
- Contractor: faster, handles regulations and moisture checks.
- DIY: slower with low voids, risk of gaps.
- Contractor: higher cost, scheduling wait.
Quick questions
Can I insulate from above without lifting every board?
You can, but you must lift enough boards to fit insulation tightly against the underside. Working through occasional hatches often leaves gaps. Lift and number a continuous run of boards bay by bay, then relay them carefully for a proper fit.
Do I need a vapour barrier under the joists?
Usually not. A breathable support net is better. Vapour-tight sheets below joists can trap moisture. If adding a membrane, use a breathable one on the warm side only and maintain void ventilation.
Will floor insulation cause damp or rot?
Not if ventilation remains clear and joists are dry before installation. Damp problems come from blocked air bricks, leaks, or ground moisture, not the insulation material. Address moisture sources, maintain airflow, and check moisture after installation.
What about pipes and electrics in the joists?
Keep cables accessible and do not cover junction boxes or downlights that require ventilation. Notch or collar insulation around pipes, leaving small gaps for access. Isolate power while working.
Do I need Building Regulations approval?
Floor insulation is a controlled fitting in England and Wales and must meet thermal and ventilation requirements. DIY is allowed if compliant. Contractors can self-certify through competent person schemes. Keep photos and documentation of work and materials.