Learn to diagnose a rainwater first flush diverter that fails to switch after rain and size it correctly for a 200 sqm roof.
If your rainwater tank first flush diverter is not switching after rain, check for a blocked inlet, a stuck float or valve, or siphon failure. Each can stop the diverter from diverting initial dirty water properly.
On this page
- The short version
- Why a first flush diverter may not switch after rain
- Symptoms of a first flush diverter clogged with leaves
- How to test a blocked inlet and fix it
- How to test and free a stuck float or valve
- How to test siphon failure and clear the diverter
- DIY first flush diverter sizing for a 200 sqm roof
- Questions people still ask
Part of our guide on identifying causes of low flow
Identify and fix the exact cause of your first flush diverter not switching after rain with clear leaf clog signs and DIY sizing for 200 sqm roofs.
| Typical roof size | 200 sqm |
|---|---|
| Diverter volume | 200-400 liters |
| Water per sqm | 1-2 liters |
| Float switch type | mechanical or siphon |
| Common clog cause | leaf debris |
The short version
- Blockages in the inlet often cause non-switching.
- A stuck float or valve prevents diverter activation.
- Siphon failure means water doesn’t drain from the diverter.
- Proper diverter sizing depends on 1-2 liters per square meter of roof.
- Leaf clutter symptoms include slow water flow and diverter overflow.
Why a first flush diverter may not switch after rain
A first flush diverter fails to switch after rain mainly due to physical blockages or mechanical faults. The most frequent cause is a blocked inlet pipe or debris accumulated inside the diverter chamber. This prevents water from entering or moving freely to trigger the switching mechanism.
Another common problem is a stuck float or valve. The float is meant to rise with incoming rainwater, closing the diverter once the first flush volume fills. If it sticks due to grime or mechanical failure, the diverter stays open or closed incorrectly.
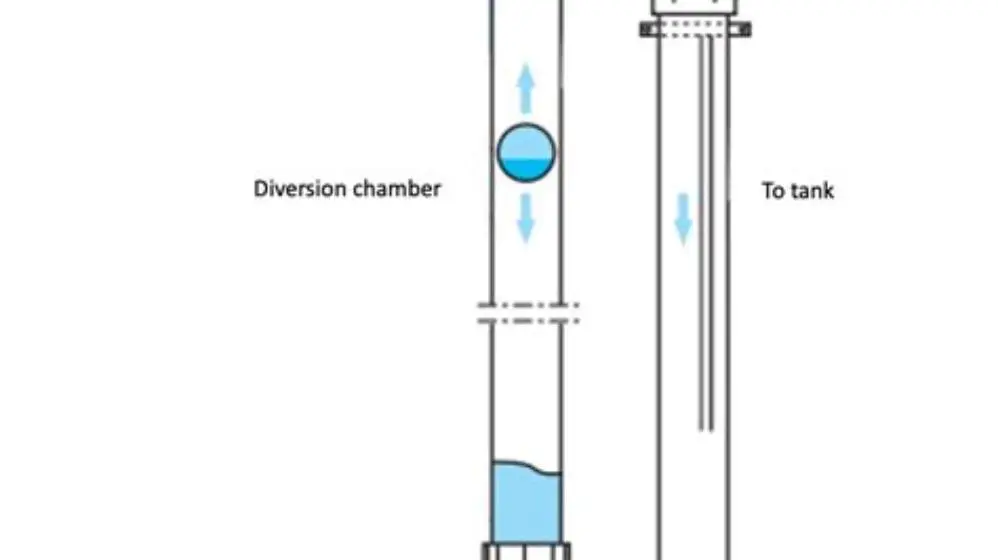
Siphon failure, where the water trapped in the diverter does not drain properly, also prevents switching. If the water level inside the diverter remains high, the system can’t reset to divert the next rain event’s first flush.
In some cases, the diverter may fail to switch if the rainfall intensity is too low. Light drizzle might not provide enough water flow or volume to raise the float or activate the valve mechanism, so the first flush remains in a standby state. This condition is typical for systems sized for moderate storms but challenged by prolonged light rain events. People in this spot often ask about how to fit rainwater diverter kit as well.
Temperature fluctuations can affect the mechanical parts inside the diverter. Cold weather may cause materials to contract or lubricants to thicken, making the float or valve stiffer and less responsive. Users in cooler climates should consider this factor during installation and maintenance, possibly opting for diverters with temperature-resistant components.
- Blocked inlet: stops water flow into the diverter chamber.
- Stuck float/valve: prevents mechanical switching action.
- Siphon failure: water does not drain, blocking resets.
Symptoms of a first flush diverter clogged with leaves
When leaves clog the first flush diverter, several symptoms arise. The most obvious sign is slow or no water flow into the rainwater tank after rainfall, despite rain on the roof. The diverter’s inlet pipe may overflow or water pond around it due to blockage.
You might notice the diverter never switches or resets between rain events. This means the initial dirty runoff is not diverted properly, risking contamination of stored water. Leaves can also cause the float or valve to jam in place. For the detail, see our notes on rainwater pump keeps running full tank.
Pooling water around the diverter or dripping at the outlet despite dry weather points to slow drainage caused by clogging. Over time, leaf debris can degrade diverter performance, requiring regular inspection and cleaning.
A practical way to confirm leaf clogging is to observe the timing of the diverter’s reaction relative to rainfall. For instance, after a 10 mm rain, the diverter should switch within minutes if clear. If it remains static for hours or days, blockage is probable. Measuring the height of water pooling around the diverter can help quantify the severity of the obstruction.
Leaves trapped inside the diverter chamber may start to decompose, releasing tannins and organic compounds that discolor the water and foul the tank. This biochemical buildup can harm downstream filtration systems and reduce water quality. Regular inspections every three months during leaf fall seasons can prevent this issue from escalating. There is more on low flow toilet keeps refilling after flush in a separate guide.
- Slow/no water flow after rain despite wet roof.
- Diverter inlet overflows or leaks around the base.
- Float or valve jam due to trapped leaf debris.
- Persistent water pooling or dripping post rain.
How to test a blocked inlet and fix it
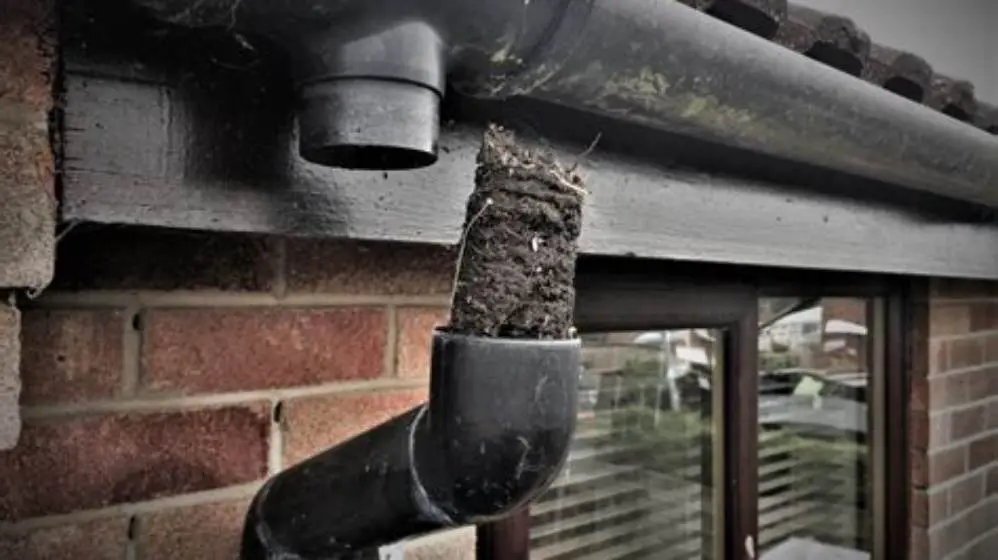
To confirm a blocked inlet, visually inspect the inlet pipe and diverter entrance for leaf debris or sediment build-up. The blockage will usually appear as a leaf jam or dirt layer restricting flow.
Flush the inlet pipe with a hose or use a plumbing snake for stubborn blockages. Remove visible leaves manually using gloves or a small brush. Clearing the inlet restores water flow and often fixes switching problems immediately.
If the diverter is buried or hard to access, removing the top cover may be necessary. Regularly preventing leaves from entering the inlet pipe by installing a leaf guard mesh can avoid repeat clogs. For the detail, see our notes on rainwater tank size for 1500 sqft roof.
A worked example: Suppose a visual check shows a leaf cluster blocking about 30 cm of the 50 mm inlet pipe. Flushing with a hose at 2 bar pressure dislodges the obstruction, restoring full flow. Testing after clearing should show water entering the diverter freely within 2 minutes of rain starting.
If flushing fails, the blockage might be deeper inside the pipe or diverter chamber. In that case, using a flexible plumber’s snake of 3 to 5 mm diameter to gently push or pull debris free is effective. Take care to avoid damaging any seals or plastic parts during this process.
- Visual check for leaf or sediment blockage at inlet.
- Use water hose to flush out small debris.
- Manually remove leaves with gloves or brush.
- Install leaf guard mesh to prevent future blockages.
How to test and free a stuck float or valve
First flush diverters rely on a float to switch once the first flush volume fills. To test if the float or valve is stuck, gently move it by hand or tap it to see if it moves freely. A stuck float often feels jammed or does not respond to gentle pressure. If that sounds like your situation, read up on downpipe outlet blockage checks next.
If the float is stuck, clean any grime, scale, or leaf material around the pivot or valve seat. Lubricate moving parts with a silicon spray safe for plastics if recommended by the manufacturer.
Replacing a persistently stuck float or valve may be necessary if cleaning fails. Check the device’s manual for the correct replacement part, as specifications vary widely between models.
If manual movement of the float reveals it only moves partially or with resistance, this indicates partial seizure. In such cases, soaking the pivot area in a mild vinegar solution for 30 minutes can dissolve mineral buildup before cleaning and lubricating.
A stuck valve can cause the diverter to fail in either the open or closed position. Testing involves pouring a known volume of water (say 10 liters) into the diverter and observing whether the valve closes or stays open. A valve stuck open will let all water pass through, defeating the first flush function; stuck closed causes immediate overflow.
- Manually move the float or valve to check for freedom.
- Clean grime or debris from pivot points.
- Apply silicon lubricant if safe and appropriate.
- Replace float or valve if it remains stuck.
How to test siphon failure and clear the diverter
The siphon drainage inside a first flush diverter clears the dirty water after each rain event. To test siphon function, check whether water drains from the diverter outlet within 24 to 48 hours after rain stops.
If water remains trapped inside the diverter, siphon failure is likely. This can happen because of blockages in the outlet pipe or damage to the siphon tube. The diverter cannot reset, so it fails to switch for the next rainfall.
Clearing the outlet pipe by flushing with water or using a flexible brush can restore siphon action. Inspect for cracks or leaks in the siphon tube as well; replace it if damaged to ensure proper drainage.
For siphon testing, mark the water level inside the diverter immediately after rain ends and check it daily. Normally, the water level should drop by about 50% within 24 hours and drain completely within 48 hours. Failure to observe this indicates siphon or outlet blockage.
If flushing outlet pipes does not improve drainage, inspect for airlocks that can break siphon action. Introducing a small vent or bleed hole near the siphon tube top can restore flow. Some diverters include this feature; if missing, it may be retrofitted by a professional.
- Observe water level inside diverter 1-2 days after rain.
- Flush outlet pipe to clear blockages.
- Inspect siphon tube for cracks or damage.
- Replace siphon tube if drainage does not improve.
DIY first flush diverter sizing for a 200 sqm roof
Sizing a first flush diverter correctly ensures efficient removal of the first dirty runoff. The volume needed depends on the roof area and local rainfall contamination levels. For a 200 sqm roof, the usual size is 1 to 2 liters per square meter of roof.
This means your diverter chamber should hold between 200 and 400 liters. Too small a diverter risks insufficient diversion; too large wastes usable rainwater storage and adds unnecessary cost.
Measure your roof area accurately by multiplying length by width of all rainwater catchment sections. Calculate diverter volume as roof area times desired liters per square meter. Choose a diverter with slightly higher capacity than calculated to handle heavier rain events.
Remember to factor in the diverter’s outlet drainage speed. A slow drain requires larger volume to avoid overflow. Adjust volume or improve drainage accordingly.
| Liters per sqm | Roof area sqm | Diverter volume liters |
|---|---|---|
| 1 | 200 | 200 |
| 1.5 | 200 | 300 |
| 2 | 200 | 400 |
Questions people still ask
Can debris inside the diverter chamber block the float?
Yes, leaf debris or sediment inside can jam the float or valve, preventing the diverter from switching. Regular cleaning helps maintain smooth operation.
How often should I clean the first flush diverter?
Cleaning at least twice a year, ideally before and after heavy leaf fall seasons, prevents blockages and mechanical failures.
What happens if the diverter volume is too small?
If too small, the initial dirty runoff won’t be fully diverted, contaminating stored rainwater and defeating the diverter’s purpose.
Is it possible to retrofit a first flush diverter to an existing tank?
Yes, but ensure the diverter volume matches your roof size and installation allows easy access for maintenance.
How do I know if the siphon tube needs replacement?
Signs include water not draining after rain, visible cracks, or leaks in the tube. Replacement restores proper drainage.