Decide whether top down or bottom up insulation retrofit suits your 4-storey home by weighing access, heat loss priorities, disruption, and cost.
Top down retrofit suits 4-storey homes when access to upper floors is easier and heat loss through the roof and upper walls is priority. Bottom up is better if basement or ground floors are accessible with less disruption. The choice depends on building layout, access, and heat loss focus.
On this page
- The short version
- Advantages and disadvantages of top down retrofit
- Advantages and disadvantages of bottom up retrofit
- How building layout and access influence method choice
- Impact on cost, disruption, and energy performance
- Retrofit insulation in 4 storey home top down or bottom up: deciding factors
- Recommended retrofit order and heat loss priorities for 4-storey homes
- Questions people still ask
Part of our guide on how does insulation work in a house
Choosing top down versus bottom up retrofit insulation in 4-storey homes hinges on access, heat loss focus, and managing disruption for best results.
| Typical heat loss | 25-35% via roof and upper walls |
|---|---|
| Access needed | Roof or basement entry |
| Disruption level | Moderate to high |
| Cost difference | Varies by access complexity |
The short version
- Top down retrofit targets upper floors and roof spaces first, reducing heat loss where it’s greatest.
- Bottom up retrofit focuses on basement and lower floors, often less disruptive internally.
- Building access strongly influences which method is more feasible and cost-effective.
- Disruption varies; top down can require scaffolding and roof access; bottom up may disrupt occupants more inside.
- Energy performance gains depend on insulating the biggest heat loss areas first.
Advantages and disadvantages of top down retrofit
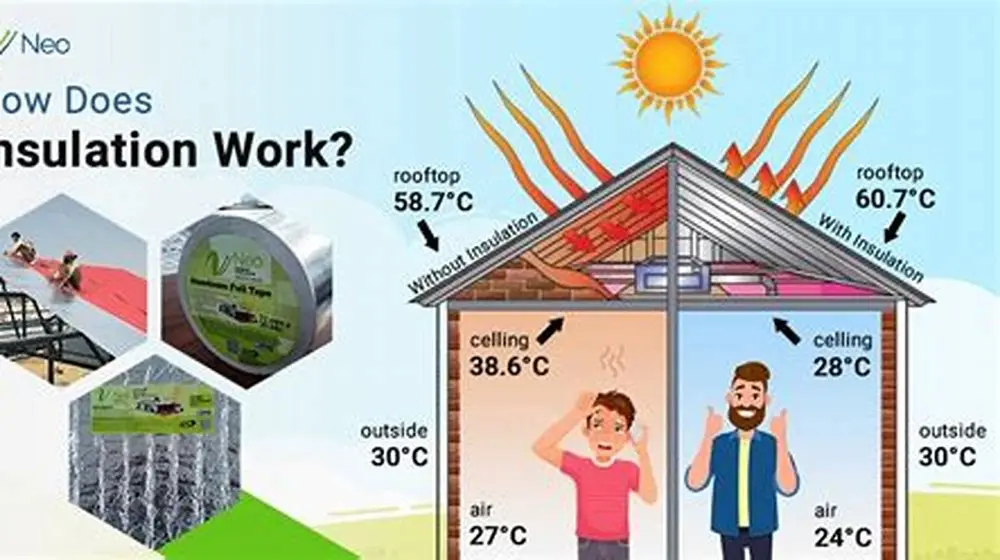
Top down retrofit usually starts with insulation installation in roof spaces and upper walls of a 4-storey home. This method targets the 25-35% of heat loss typically occurring through roofs and the upper building envelope first, making it effective for energy savings.
Access to roof spaces is crucial; if the roof is easily reachable via loft hatches or accessible lofts, this method reduces heat loss quickly. However, top down requires external scaffolding or ladders for wall insulation and roof work, which can raise costs and cause external disruption.
Internal disruption may be less than bottom up since work occurs mostly at upper levels and the roof. It also allows for phased work, insulating roof and upper walls first, then moving downwards if needed.
Challenges include moisture control in roof voids and ensuring airtightness around loft hatches to prevent drafts. The need for temporary weather protection during work can increase complexity. Before you commit to anything, it is worth looking at energy savings from loft insulation.
- Targets highest heat loss areas first
- Typically less internal disruption
- Allows phased insulation approach
- Requires roof and scaffolding access
- Potentially higher external disruption
- Moisture management in roof void needed
Advantages and disadvantages of bottom up retrofit
Bottom up retrofit begins insulation from the lowest floors or basement, working upward through the building walls and floors. This suits 4-storey homes with accessible basements or ground floors where scaffolding or roof access is limited or costly.
This approach generally involves more internal work, affecting living spaces and requiring temporary relocation or rearranging occupants during installation. It may cause higher disruption inside than top down.
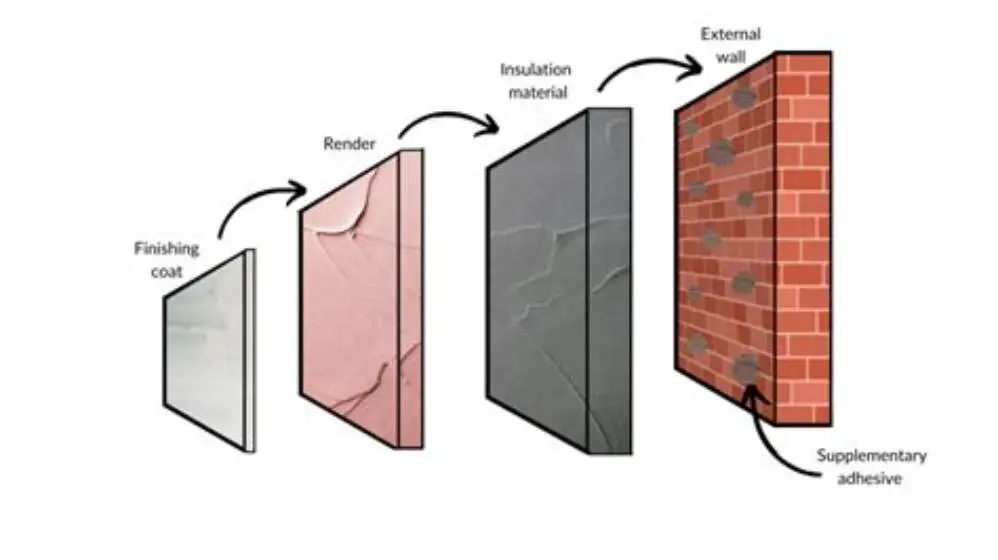
It improves comfort on lower floors by reducing cold floors and dampness often found in basements or ground levels, which can also reduce drafts and moisture issues. We go through insulating solid walls internal or external step by step elsewhere on the site.
Energy savings through bottom up depend on the relative heat loss contribution of lower floors, which is often less than the roof. Therefore, it may take longer to see significant bill reductions if roof insulation remains poor.
In some cases, bottom up retrofit can also improve the structural integrity of basement walls if combined with damp-proofing treatments. For example, adding external insulation and waterproof membranes when accessible can protect foundations from moisture ingress, which is especially beneficial in older 4-storey homes with known basement damp issues.
A practical check after bottom up retrofit is to monitor indoor humidity levels and wall surface temperatures at basement and ground floor levels. If insulation and moisture control are effective, surface temperatures will rise above dew point, reducing condensation risks. Conversely, cold spots or persistent dampness indicate insulation gaps or ventilation problems needing correction. For the detail, see our notes on does your home have enough insulation.
- Better for homes with basement access
- Reduces cold floors and dampness
- May avoid costly scaffolding or roof work
- Higher internal disruption for occupants
- Insulates lower heat loss areas first
- May require occupant relocation temporarily

AccuMEMS GT16S Thermal Camera,AI Scene Detection,Thermometer Mode
Detects temperature differences as small as 0.05°C, meeting the requirement to identify heat loss areas effectively.
How building layout and access influence method choice
The physical configuration of a 4-storey home strongly dictates whether top down or bottom up retrofit is feasible. Homes with a large, accessible roof space and minimal internal constraints often favor top down.
Conversely, if the basement or ground floor has accessible, unfinished walls and ceilings, bottom up insulation can be more straightforward. Narrow staircases or fragile upper floors complicate top down internal work.
External access is a central factor. Roof scaffolding can add 10-20% or more to costs but may reduce internal disruption. Restricted street access or conservation area rules might prohibit external scaffolding, pushing the choice toward bottom up. If that sounds like your situation, read up on cellulose loose fill settling rate after installation next.
Heating system layout also matters. Buildings with heat loss concentrated near upper floors benefit more from top down. If heat escapes via cold basement floors or walls, bottom up better tackles the issue directly.
| Factor | Favors Top Down | Favors Bottom Up |
|---|---|---|
| Roof access | Easy, large loft space | Limited, small or no loft |
| Basement access | Limited or finished space | Large, unfinished basement |
| External scaffolding | Allowed and feasible | Restricted by location |
| Internal disruption tolerance | Low (less internal work) | High (more internal work) |
| Heat loss focus | Roof and upper walls | Basement and lower floors |
Impact on cost, disruption, and energy performance
Top down retrofit generally costs more if external scaffolding is needed; expect increases of 10-25% compared to bottom up due to labor and equipment. However, the quicker energy gains from insulating upper heat loss zones can offset this over 3-5 years.
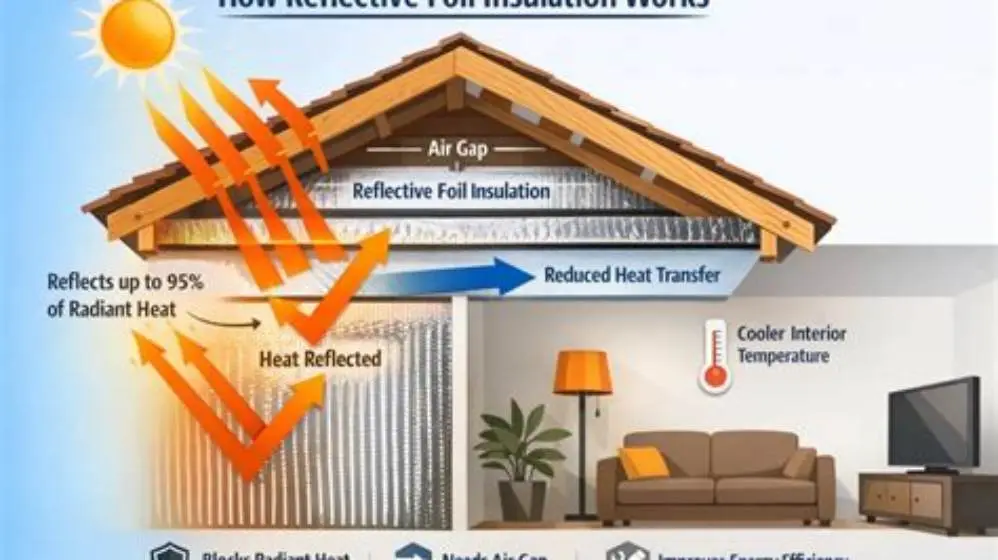
Bottom up typically involves more disruption inside the home, potentially requiring occupants to vacate rooms or floors temporarily, which can add indirect costs like alternative accommodation or inconvenience. The other half of this decision is how reflective foil reduces heat loss.
Energy performance improvements depend on insulating areas with the highest heat loss first. Since roofs lose more heat than basement walls in most 4-storey homes, top down retrofit tends to yield faster reductions in heating bills.
Both methods require attention to airtightness and moisture control to avoid condensation damage. Poorly executed insulation can worsen indoor air quality or cause mold, increasing long-term costs.
When budgeting for retrofit, expect top down scaffolding costs to range from $3,000 to $7,000 depending on property size and street conditions, potentially adding 15-25% to total project costs. Bottom up may avoid scaffolding but often requires more internal finishing work, which can also be costly depending on room use and occupant needs.
Disruption assessment should include duration and intensity. Top down work on roofs might span 1-2 weeks with intermittent external noise, while bottom up internal work can last 3-6 weeks with continuous indoor disturbance. Choosing based on occupant tolerance for timing and noise is critical to minimize inconvenience.
Retrofit insulation in 4 storey home top down or bottom up: deciding factors
You choose top down retrofit if your 4-storey home's roof and upper walls are easily accessible, heat loss there is significant, and you want to minimize internal disruption. It’s ideal where scaffolding is feasible without major external impact.
Choose bottom up when you have a usable basement or ground floor access, limited roof access, or external scaffolding is prohibited or too costly. Accept that internal disruption will be higher, and energy savings may take longer to realize.
The building’s heat loss profile, access logistics, and occupant tolerance to disruption form the core decision matrix. Prioritizing thermal zones losing the most heat first yields the best bill reductions.
A hybrid approach can be considered when budgets or access vary; start top down to tackle roof losses, then complete bottom up to address basement and floors as budgets and access allow.
| Factor | Top Down Retrofit | Bottom Up Retrofit |
|---|---|---|
| Primary heat loss addressed | Roof and upper walls | Basement and ground floors |
| Access requirements | Roof and external scaffolding | Basement or ground interior access |
| Internal disruption | Lower, mostly upper floors | Higher, living areas affected |
| Cost considerations | Higher upfront with scaffolding | Potentially lower but longer disruption |
| Energy savings speed | Faster due to roof focus | Slower if roof remains uninsulated |
Recommended retrofit order and heat loss priorities for 4-storey homes
Focus first on insulating the roof space and upper external walls, as they typically account for 25-35% of total heat loss in 4-storey homes. This can reduce heating bills noticeably and improve comfort.
After addressing the upper envelope, move down to insulate cavity walls, floors, and basement walls depending on access and budget. Prioritizing zones by heat loss impact maximizes energy savings.
Ensure all insulation materials meet a minimum thermal resistance (R-value) suited to your climate zone and building regulations. Use a thermal resistance meter or consult a professional to specify appropriate thickness and material type.
Combining insulation with airtightness improvements and controlled ventilation will improve results. A blower door test can assess air leakage post-installation to confirm effectiveness.
Planning the retrofit in phases allows you to manage cost and disruption, starting top down if roof access is easier, then progressing bottom up as necessary.
A worked example: a 4-storey home with a 30% heat loss via roof and 15% via basement walls should prioritize top down retrofit first to capture the largest savings quickly. Insulating the roof could reduce annual heating costs by up to $600, while basement insulation might yield $300 annually after.
Post retrofit, performing a blower door test provides a quantitative measure of improved airtightness. For example, reducing air changes per hour (ACH) from 5.0 to 2.5 halves uncontrolled air leakage, confirming the retrofit's effectiveness and indicating potential further improvements through sealing or ventilation upgrades.
- 1. Assess heat loss areas using thermal imaging or professional audit.
- 2. Confirm access availability for roof and basement.
- 3. Plan initial insulation at roof and upper walls (top down).
- 4. Schedule basement and lower floor insulation (bottom up) after.
- 5. Conduct airtightness and ventilation checks post retrofit.
Top down retrofit generally delivers faster energy savings in 4-storey homes with accessible roofs, but bottom up suits homes with easier basement access and where internal disruption is manageable.
Questions people still ask
Can I combine both top down and bottom up retrofit methods?
Yes, combining both methods can be effective. Start top down to insulate roof and upper walls where heat loss is greatest, then proceed bottom up for basement and floors as budget and access permit.
How disruptive is each method for occupants?
Top down typically causes less internal disruption as it focuses on upper floors and roof spaces, while bottom up often involves more living area work and may require temporary relocations.
Does roofing type affect the retrofit choice?
Yes. Complex or fragile roofs may limit top down work. Flat or accessible roofs make top down easier; steep or fragile roofs may push toward bottom up insulation.
What insulation materials are best for 4-storey home retrofits?
Materials with high thermal resistance suited to the climate zone work best. Mineral wool, rigid foam boards, or natural fiber insulation are common; selection depends on moisture risk, fire codes, and space.
How to measure success after retrofit?
Energy savings can be tracked through heating bills and indoor comfort. A blower door test and thermal imaging can verify airtightness and heat loss reductions.